With the help of this course you can participate in the Design Space community, gain inspiration and recognition.
You can easily inspire with Design Space by using a tablet, phone or even a computer for scrolling through projects and images.
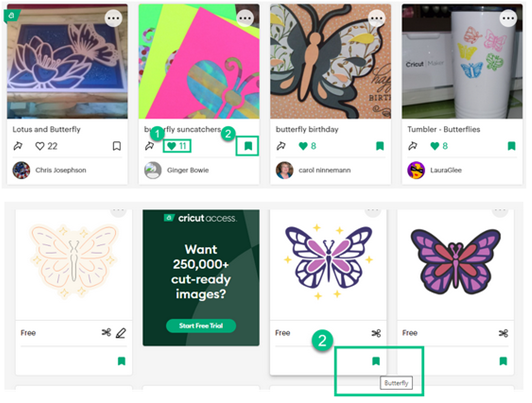
- Clicking on ‘heart’ the maker knows that you have liked a project.
- Clicking on the ‘Bookmark’ helps you save something you have found worth saving.
You will need to find the many images or projects that you have gathered. ‘My Stuff” on Design Space helps you to organize all your images and projects into ‘Collections’ or ‘Groups’.
Each member can create 5 collections. There is no limit to creating collections for access members.
To get started:
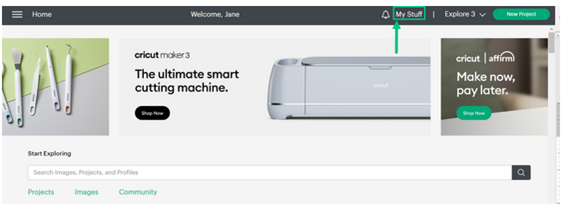
To start, you need to select ‘My Stuff’ on the header bar. This will open the ‘My Stuff’ page.
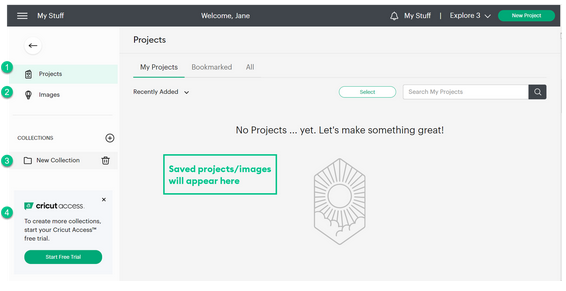
Click on ‘Projects’ to view your projects that are saved and bookmarked.
Click on ‘Images’ for displayed, bookmarked, uploaded, and also purchased images.
‘Collections’ where you can create your very own groups of images and/or projects
‘Cricut Access’ the subscription package for image/project/font.
The New users can try out the ‘Cricut Access Free’ for a month. You can further learn by clicking on the button.
Creating Collections:
Double clicking on ‘New Collection’ can make the text editable.
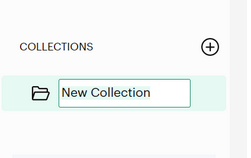
Name your collection. Here the collection is named ‘Butterflies’.
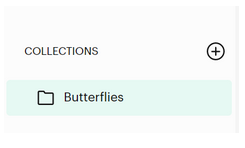
Click on the ‘Plus’ + sign for creating additional collections.
The 3 collections created here are, Birthdays, Butterflies and Christmas.
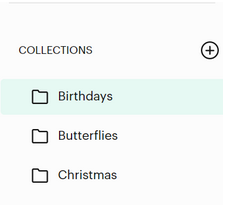
Creating ‘Collections’ you add images or projects.
Select any project/image and click the ‘Bookmark’. You can either bookmark the item or add this to the ‘Collection’. Select ‘Add to Collection’.
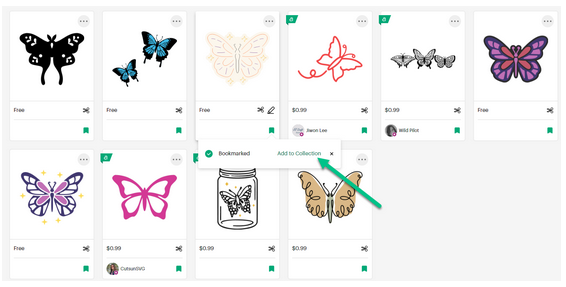
You will open a list of all the collections created. Select where the image is to be saved. Here ‘Butterflies’ is selected.
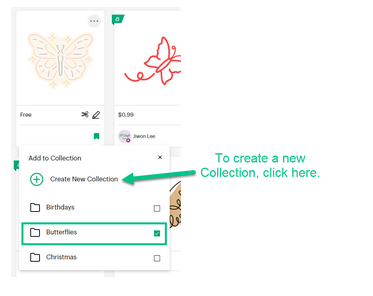
You can directly add your projects to ‘Collections’ for saving.
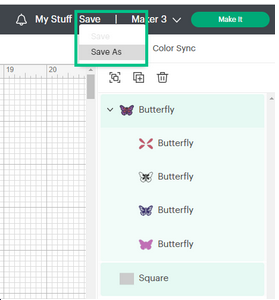
Click ‘Save’ and ‘Save as’.
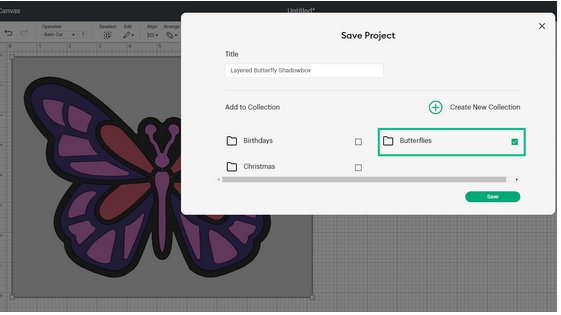
Select the ‘Collection’ where you wish to save your project.
Share a Design Space project with the Cricut Community
You are in the know of saving projects and images that you are inspired with. Sharing these projects that you have created with Cricut materials, machines, and accessories can be an inspiration for others. This helps you in earning recognition.
When preparing to share your project, ensure you have good photos that are inspirational.
Any more information on photos you can get from ‘Cricut Help’ article: How do I create a quality photo of my project on the Cricut Community?
Log in to Design Space. Select ‘My Stuff’.
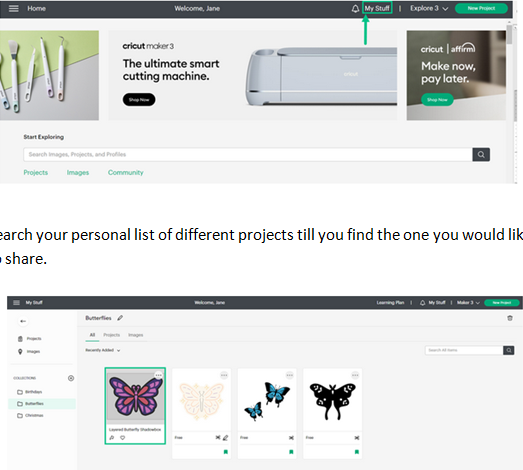
Search your personal list of different projects till you find the one you would like to share.

Select the ‘Share’ icon that is on the project tile in the lower left corner.
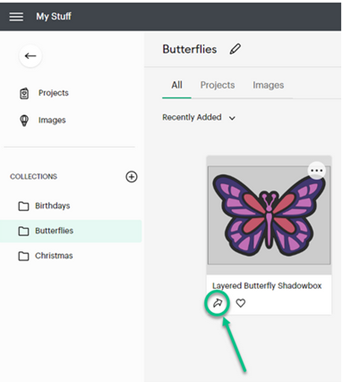
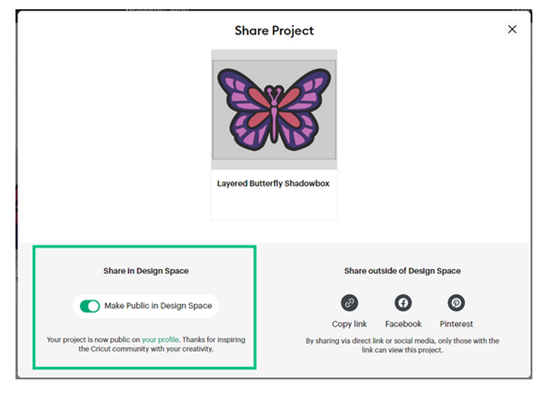
Switch on the toggle for project visibility. This can be easily searched on Design Space.
Once the project is public on Design Space, it is also visible on your ‘Profile’. Learn more about creating your profile
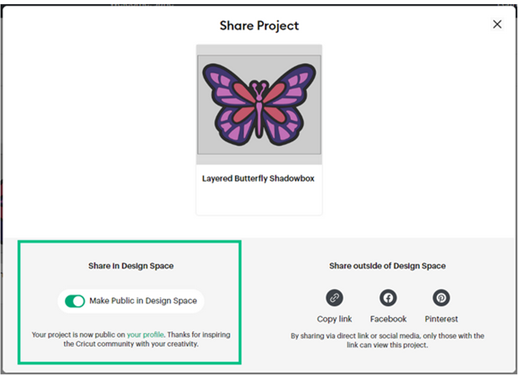
Table of Contents
ToggleShare outside of Design Space
For sharing any project outside of the Design Space, you need to copy a direct link that allows you to share via e-mail or instant message, or choose to share to Pinterest or Facebook.
Edit Project Details
Making a project public in Design Space, offers you an opportunity to inspire many others in the Cricut Community. This can be done by adding images of the finished project, details of how you were inspired and how the project was made, the materials used. You can help others by tagging so that they find the project easily.
Select the ‘three dots’ on the upper right corner of the tile or project details view.
Select the ‘Edit Project Details’.
This is where you can:
- Add the photos taken earlier
- Edit the project’s name
- Describe the project along with the materials used or any tricks and tips you would like to share.
Adding tags helps others in finding your project with ease. You can choose from more than 500 tags.
Click here for instructions on adding the information of the project and photos, on the Cricut Help site.
Expand your community
Once you have the required knowledge of saving and sharing your projects, all the ‘likes’ and ‘shares’ helps you connect with the Cricut Community.
You scrolled through the projects and images on Design Space and bookmarked and liked a few. You would want to see all the images and projects in one place.
Click on ‘My Stuff’ and ‘projects’.
Click My Stuff and Projects.
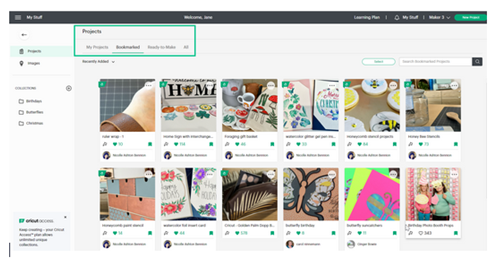
Here you can see all your images and projects and any other ‘Collections’ created.
Sort the information by selecting links at the top of the page. Here selected has been ‘Bookmarked’.
It is possible to have liked a number of projects from different makers of the community. You can follow them if you wish to see more of their projects. You need to click on any name under a liked or bookmarked project.
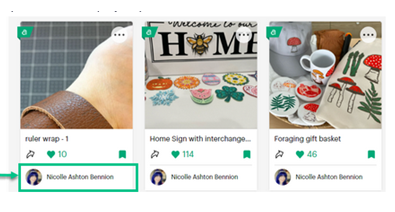
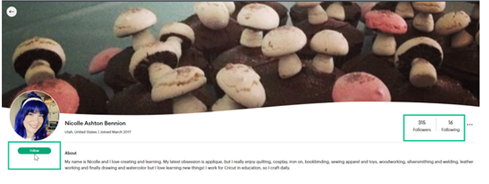
This opens their ‘Profile’ page and you can se the projects that they have shared, how many followers they have made and also who they are following. Click ‘Follow’ if you want to follow them and be notified when any additional projects are shared.
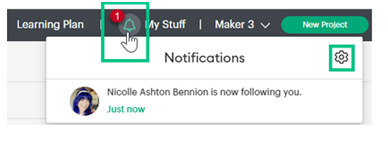
Next to the ‘Notification Bell’ you get notifications as numbers on the top of the screen of Design Space.
The notifications received can be controlled by clicking on the ‘Notification Bell’ and the icon of ‘Settings’ in the ‘Notification’ window.
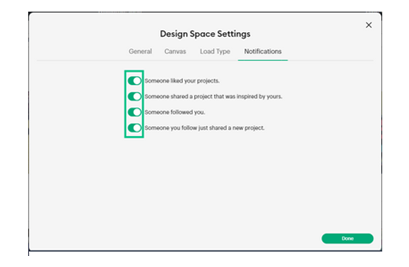
You can select the notification type. Slide the toggle to the right and click ‘Done’
The more you share, the more your community will grow. You will inspire others as you have been inspired!
Your community grows with the number you share. You can now inspire others the way you were inspired.
