
As we rely more on our computers for work, entertainment, and daily tasks, it’s crucial to maintain an organized and efficient digital space. A cluttered and disorganized PC not only affects performance but can also lead to frustration and wasted time. In this comprehensive guide, we’ll walk you through the process of cleaning and optimizing your PC space, ensuring a smoother and more efficient computing experience. Accompanied by detailed instructions and helpful screenshots, you’ll be able to reclaim valuable storage, enhance speed, and declutter your digital environment.
Step 1: Assessing Your Storage Space
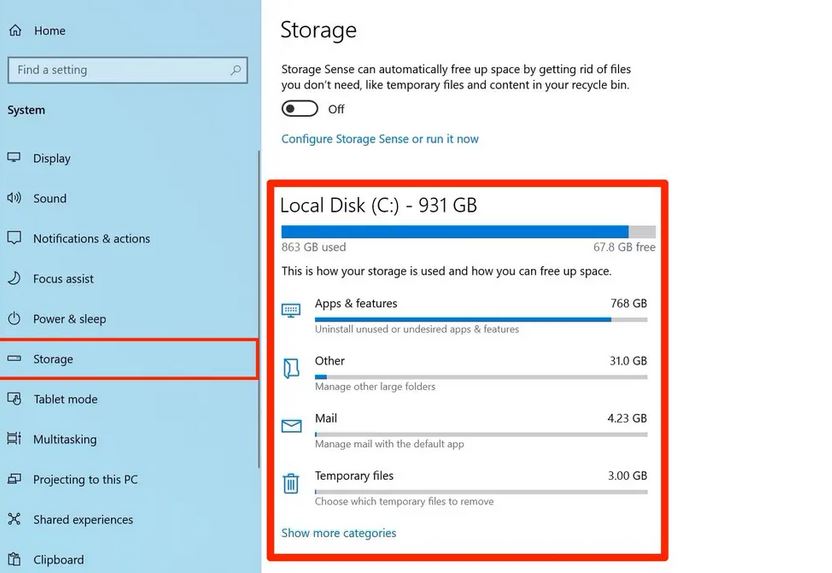
- Open File Explorer: Navigate to your desktop or click on the File Explorer icon in the taskbar to access your files and folders.
- Check Drive Storage: Right-click on the drive where your operating system is installed (usually C:), and select “Properties.” This will show you the used and free space on your drive.
- Identify Space-Hogging Folders: Examine your folders and identify large files or folders that are consuming significant disk space.
Step 2: Removing Unnecessary Files and Temporary Data
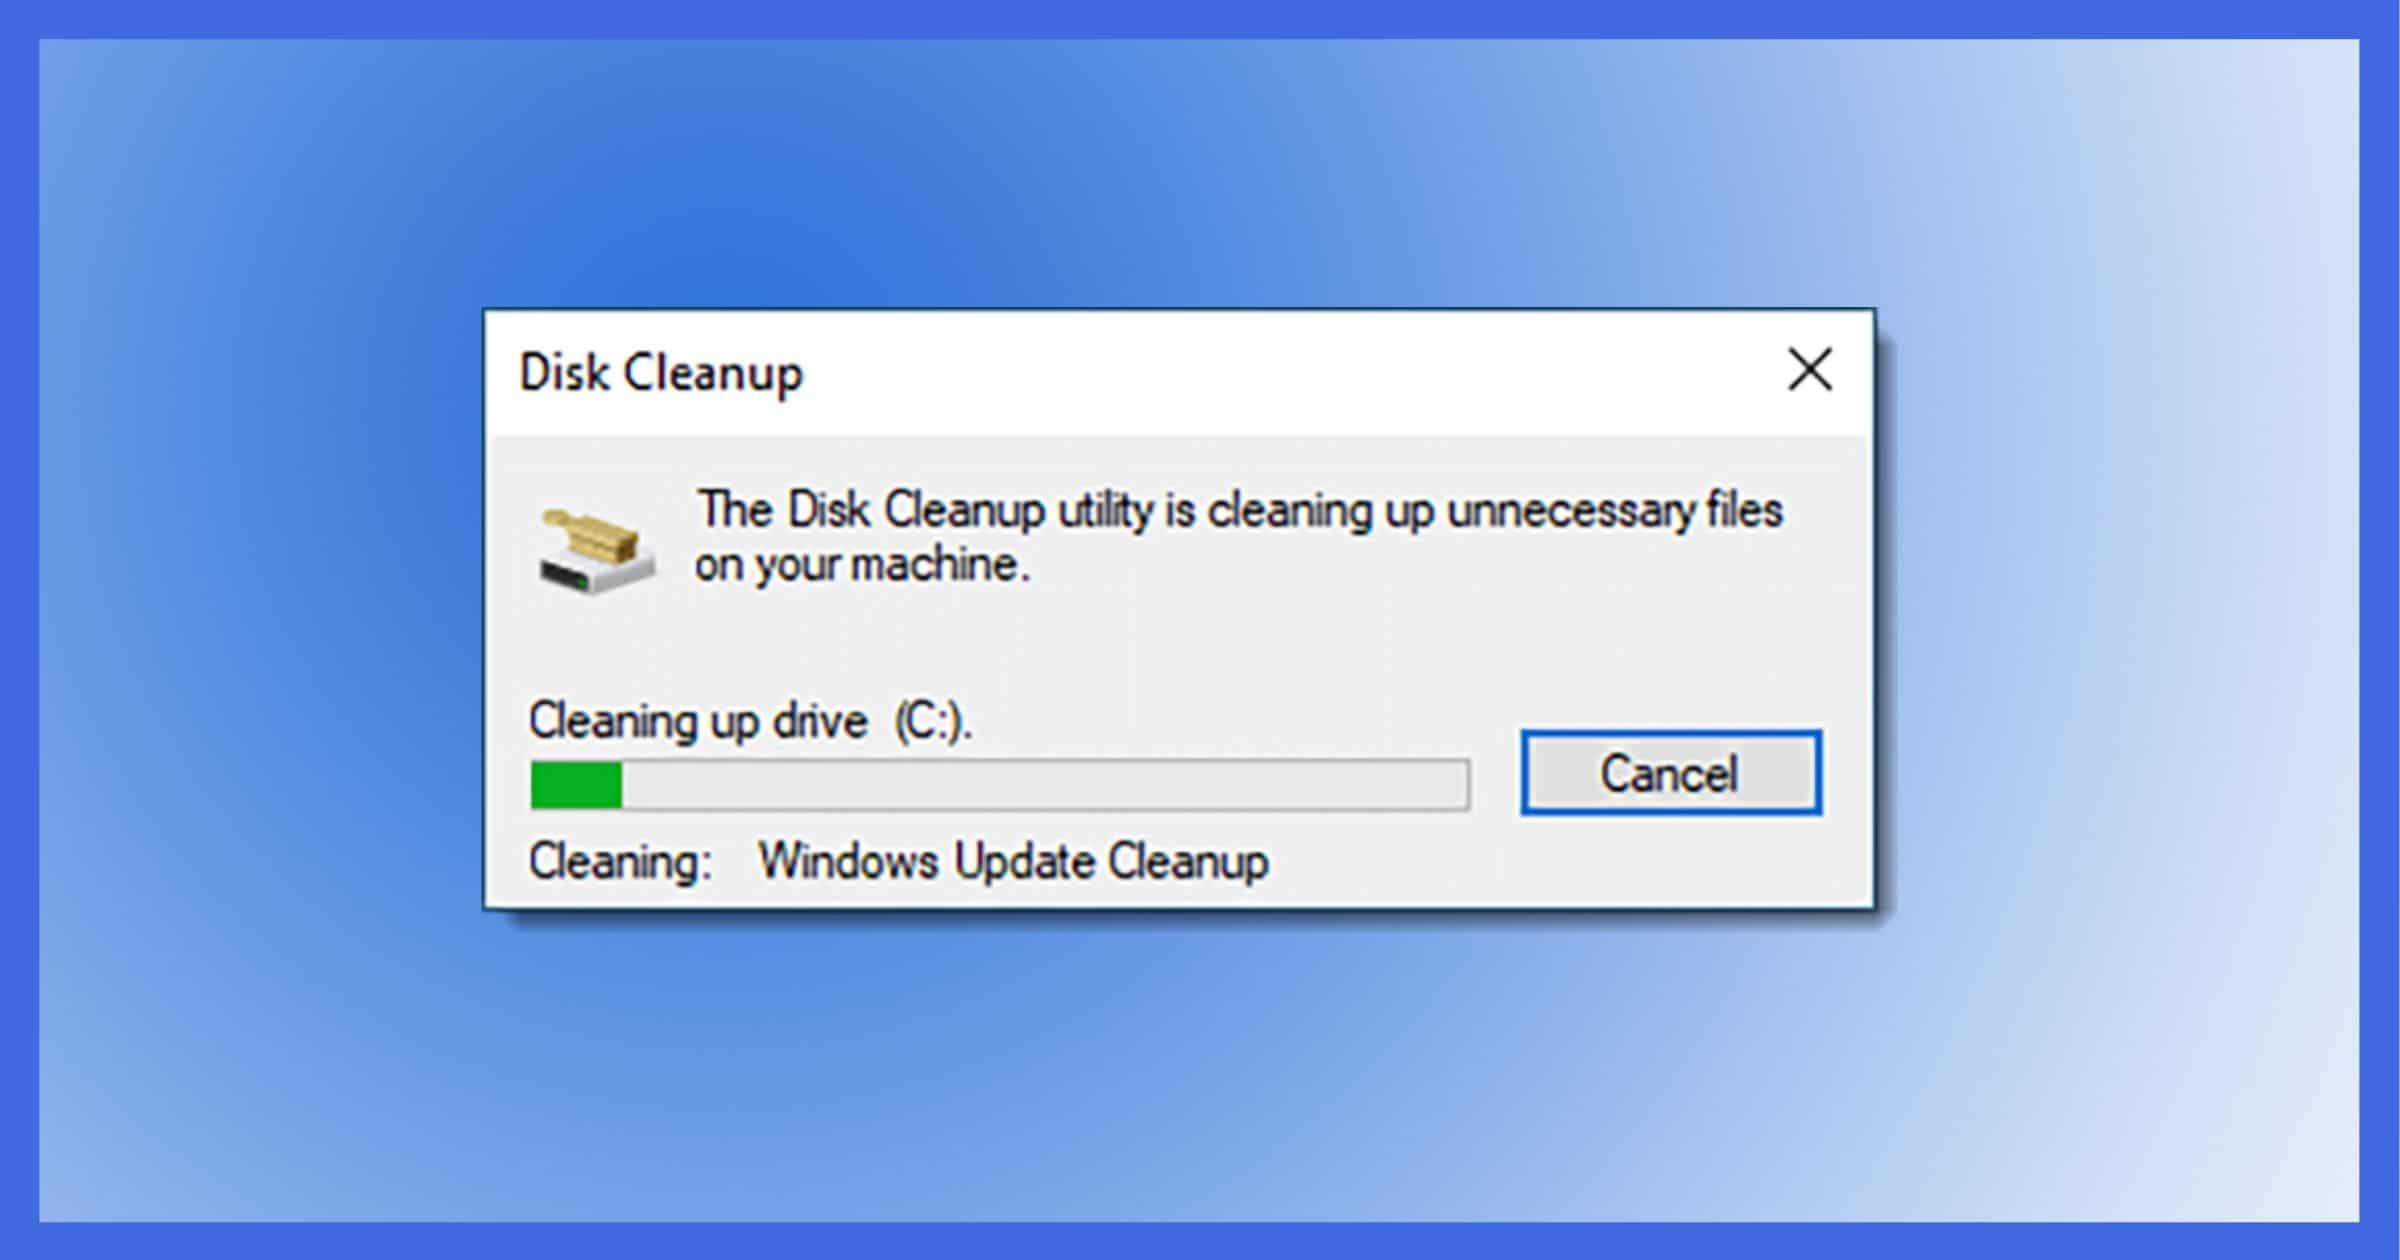
- Access Disk Cleanup: Type “Disk Cleanup” in the Windows search bar and select the utility from the results.
- Select Drive: Choose the drive you want to clean (usually C:) and click “OK.”
- Scan for Files: The utility will calculate how much space you can free up. Check the categories you want to clean, such as Temporary Internet Files and Recycle Bin.
- Start Cleanup: Click on “OK” and then “Delete Files” to initiate the cleanup process.
Step 3: Uninstalling Unused Programs
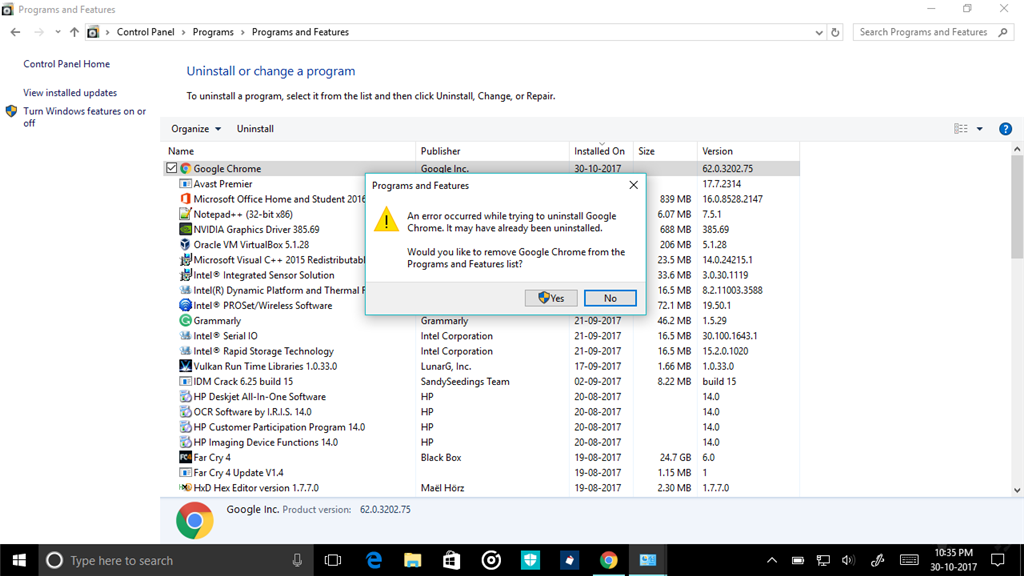
- Open Control Panel: Type “Control Panel” in the Windows search bar and select the utility from the results.
- Navigate to Programs: Click on “Programs” and then “Programs and Features.”
- Uninstall Programs: Identify and uninstall programs you no longer need by right-clicking on them and selecting “Uninstall.”
- Follow Uninstallation Wizard: Follow the on-screen instructions to complete the uninstallation process.
Step 4: Organizing and Consolidating Files
- Create Folders: Organize your files into specific folders based on categories (e.g., Documents, Pictures, Videos).
- Delete Duplicates: Identify and delete duplicate files using tools or manually comparing files.
- Move to External Storage: Consider moving large files or folders, like old photos or videos, to an external hard drive to free up space.
Step 5: Managing Startup Programs
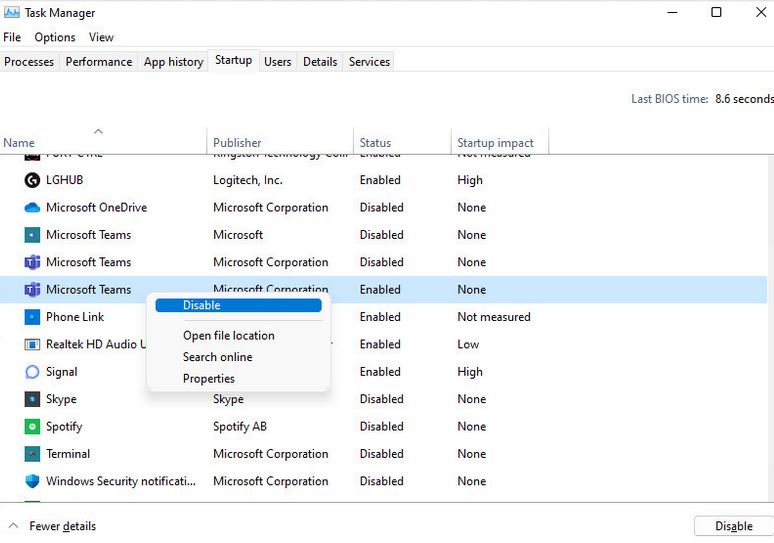
- Open Task Manager: Right-click on the taskbar and select “Task Manager.”
- Navigate to the Startup Tab: Click on the “Startup” tab to see a list of programs that launch at startup.
- Disable Unnecessary Startup Programs: Right-click on programs you don’t need at startup and select “Disable.”
- Restart Your PC: Restart your computer to apply the changes and experience a faster startup.
Step 6: Utilizing Storage Optimization Tools
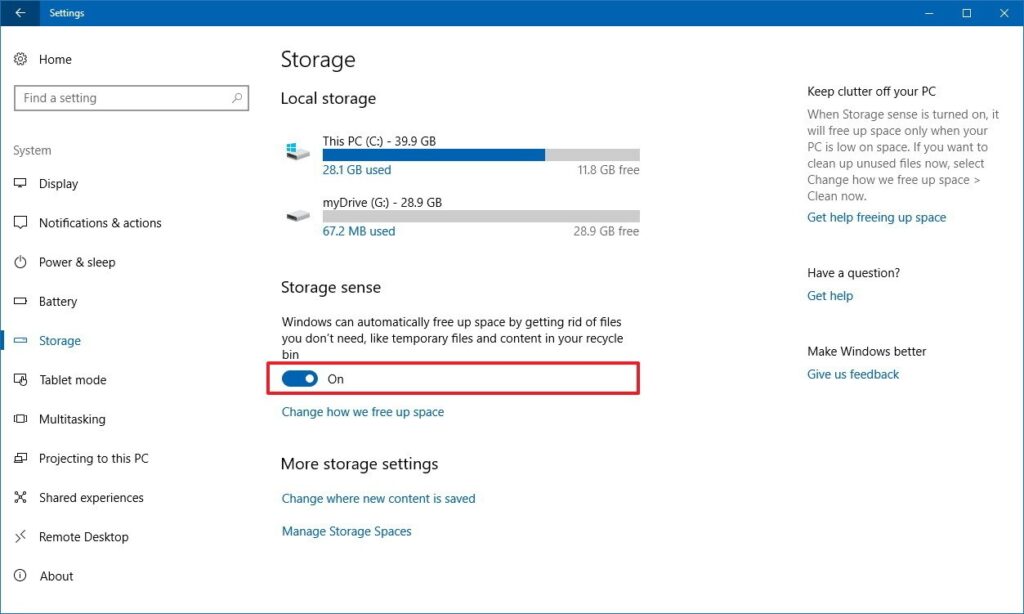
- Access Storage Sense: Type “Storage Settings” in the Windows search bar and select the utility from the results.
- Enable Storage Sense: Toggle the switch to enable Storage Sense, which automatically frees up space by deleting unnecessary files.
- Configure Storage Sense Settings: Click on “Configure Storage Sense or run it now” to customize cleanup settings.
- Set Cleanup Frequency: Choose how often you want Storage Sense to run and delete files.
Step 7: Updating and Maintaining Your System
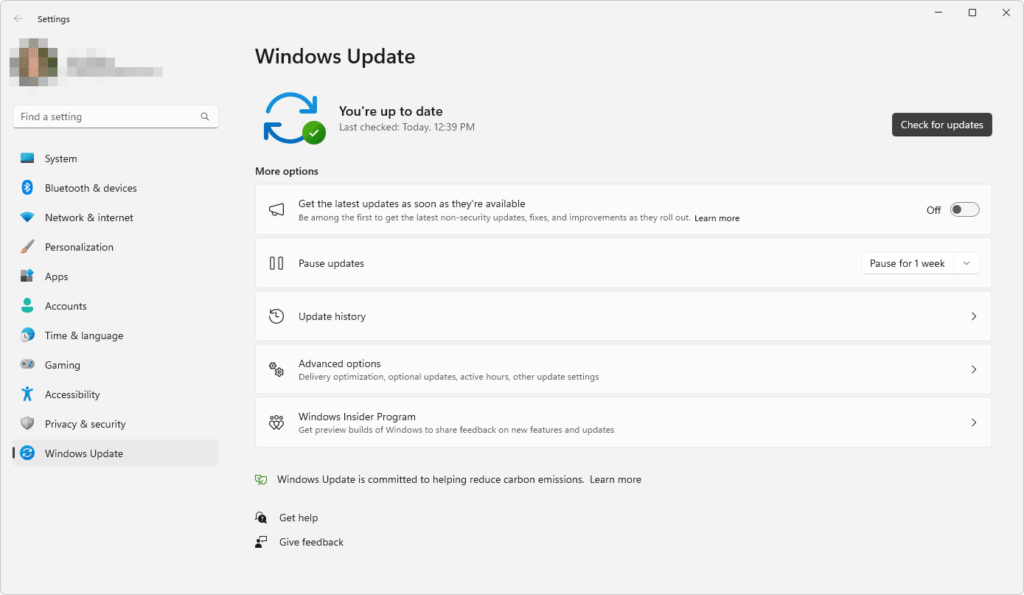
- Check for Windows Updates: Type “Windows Update” in the Windows search bar and select the utility from the results.
- Check for Updates: Click on “Check for updates” and install any pending updates for your operating system.
- Update Drivers: Ensure your hardware drivers are up to date for optimal performance.
- Regular Maintenance: Schedule regular disk cleanup, check for updates, and maintain a clutter-free desktop.
By following these steps, accompanied by detailed screenshots, you can effectively clean and optimize your PC space for improved performance and efficiency. Regular maintenance of your digital environment not only enhances speed but also contributes to a more enjoyable computing experience.
Remember, the key to a smoothly running computer is consistent and proactive management. Adopting these practices into your routine will help you keep your PC organized, decluttered, and ready to handle your tasks efficiently. As you embark on this digital spring-cleaning journey, you’ll likely find that a well-optimized PC translates to a more enjoyable and productive computing experience.