Here you learn the navigation of the improved and new Layers Panel. You also learn combination of objects with the help of the new ‘Combine’ menu.
Why change the Design Space Canvas?
- The ‘Combine’ Menu is reversible and can also help you to combine different images in creative and different ways. This can be reverted back.
- The design layers can be renamed. Keeping track of this gets easier and you can work on any complex designs.
- When you change the ‘Design Space Canvas’, the design gets not only easy but also intuitive and maintains the flexibility of the ‘Weld’ function.
Review the New Layers Panel.
The ‘Layers Panel’ that is placed on the right side of the Canvas appears different. The ‘Duplicate’ and ‘Delete’ remain there at the top. The ‘Group’ and the ‘Ungroup’ are merged into a single ‘smart’ button. With the selection of multiple items, this turns into a ‘Group’ button.
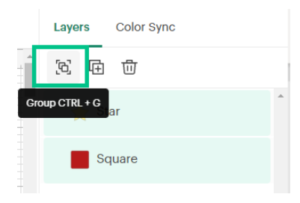
With the selection of only one group, this becomes ‘Ungroup’.
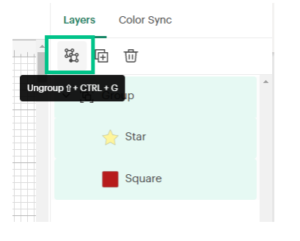
Each of the rows in the ‘Layers Panel’ represents a different image, color or shape on the ‘Canvas’.
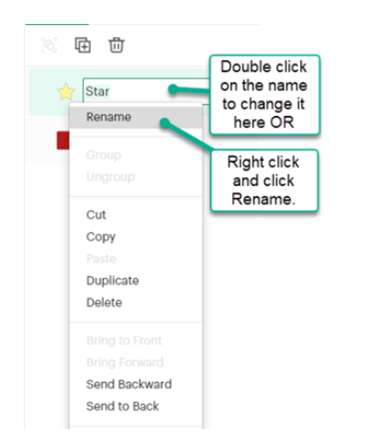
To rename it in this new version, you need to right click this with the mouse, or double click on any of the layers for renaming.
Explore the new Combine Menu
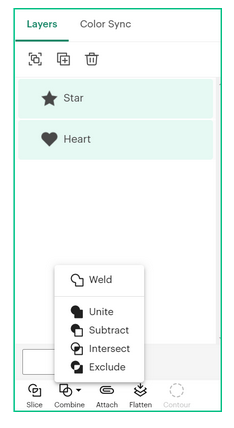
The ‘Combine’ menu is at the bottom of the ‘Layers’ panel. This menu is at the same place where the ‘Weld’ button was placed. This menu will help you with specifications for combining objects on the ‘Canvas’ beyond ‘Slice’ and ‘Weld’.
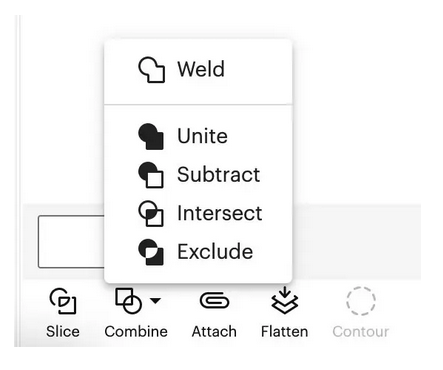
All the details will be looked at below.
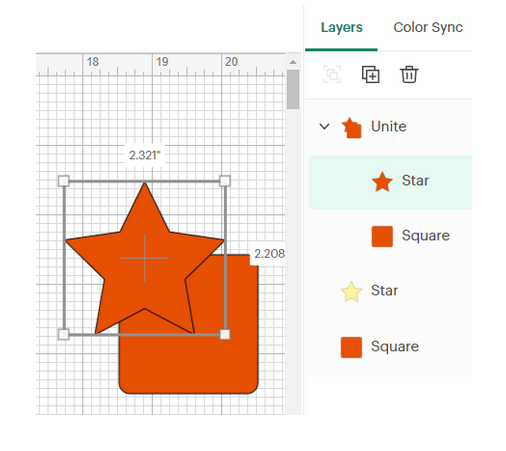
Join shapes together with Unite. .
The action is used for joining two or even more shapes into a single shape.
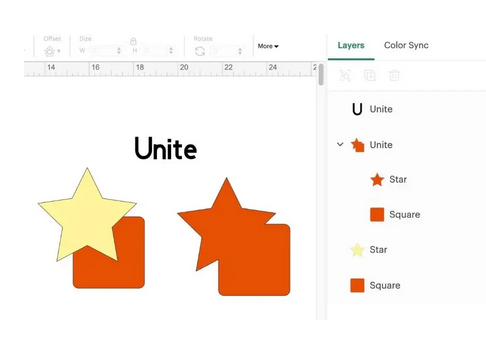
Note: You are able to access every original shape when selecting each shape in the ‘Layers’ Panel. You can resize, move and also rotate these.
‘Unite’ helps you to undo what has be done when you access the ‘Combine’ menu here. This is unlike ‘Weld’.
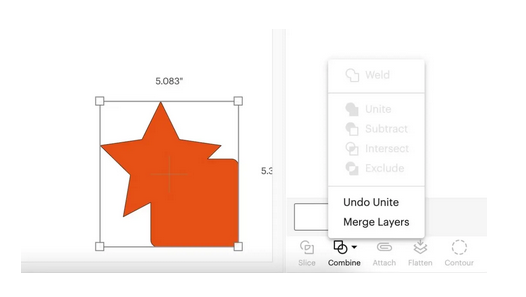
Differentiate between Unite and Weld.
Both of the functions help in merging the shapes quickly. With ‘Weld’ you cannot undo the resulting shape. This function is perfect for sharing projects that are multi-layered and complex. This ensures that there are no changes made accidentally by others.
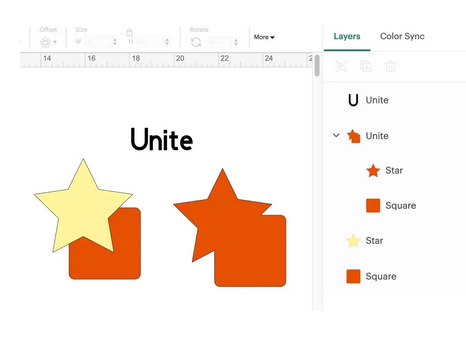
Table of Contents
ToggleTake it away with Subtract
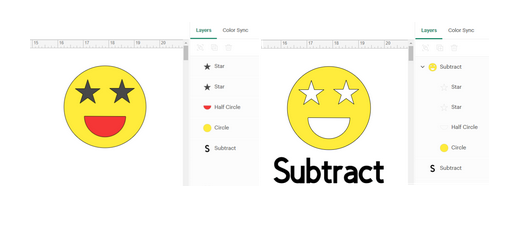
With this action you are able to remove the shapes from the layers that were selected last of a specific group. You do not lose any leftover pieces. You are able to subtract multiple times out of the single bottom layer at the same time.
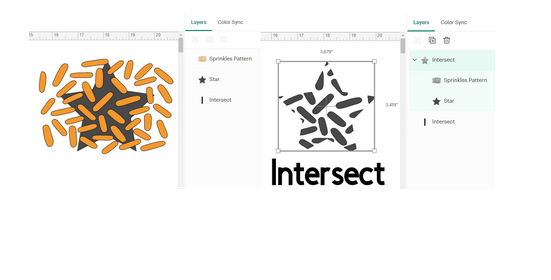
Bring together with Intersect.
With ‘Intersect’ you can join parts that are overlapping of two or even more shapes. The top layers are left in the form of the ‘bottom’ layer. The parts that are common in both the images are left.
Remove bits with Exclude.
‘Exclude’ works the opposite of ‘Intersect’. With this you can take the top layer off the bottom layer. You can edit the excluded image till the time you are able to merge the layers.
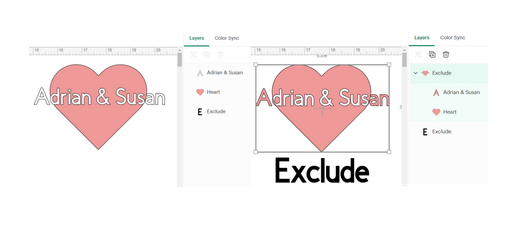
Double clicking on the layers allows you to move r even resize these. Releasing the mouse, the image is able to retain the changes made.
Move things around between layers
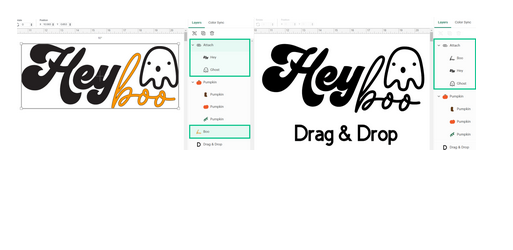
You are also allowed to drag and drop the layers between the groups.
The example given below shows the “Hey” along with the image of the ghost are in the ‘attached’ group and “boo” is away from this.
When you click on “boo” and drag this to the top group it has become a part of the group that is attached.
Bring it all together with Merge Layers.
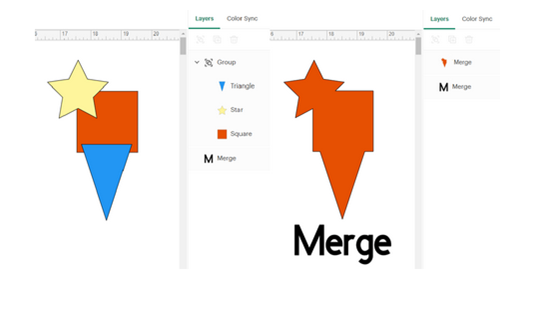
If you’ve created many layers, and you want to simplify by making them one layer, click on combine and merge layers.
By clicking on ‘’Combine’ you can simplify the many layers created and merge these into a single layer.
