
A stable and reliable Wi-Fi connection is paramount for seamless digital experiences. However, even with the advancements in technology, users may encounter Wi-Fi issues on their Windows 11 devices. In this comprehensive guide, we’ll delve into troubleshooting techniques and effective solutions to address and fix common Wi-Fi problems on Windows 11. From connectivity hiccups to slow speeds, we’ll navigate through the challenges, offering step-by-step solutions to ensure your Windows 11 device stays connected and performs optimally.
1. Identifying Wi-Fi Issues: Understanding the Symptoms
Before diving into solutions, it’s crucial to identify the symptoms of Wi-Fi issues. Common indicators include:
- No Connection: The device fails to connect to any Wi-Fi network.
- Limited Connectivity: The device connects but shows limited or no internet access.
- Slow Speeds: The Wi-Fi connection is established, but speeds are slower than expected.
- Intermittent Connectivity: Frequent disconnections or drops in signal strength.
Understanding these symptoms will guide your troubleshooting process.
2. Basic Troubleshooting Steps: Quick Fixes
- Restart Your Device: A simple restart often resolves transient issues. Restart your computer and the Wi-Fi router.
- Check Airplane Mode: Ensure Airplane Mode is turned off. This disables all wireless connections, including Wi-Fi.
- Verify Wi-Fi Button/Shortcut: On laptops, check for a physical Wi-Fi button or shortcut key combination. Ensure Wi-Fi is enabled.
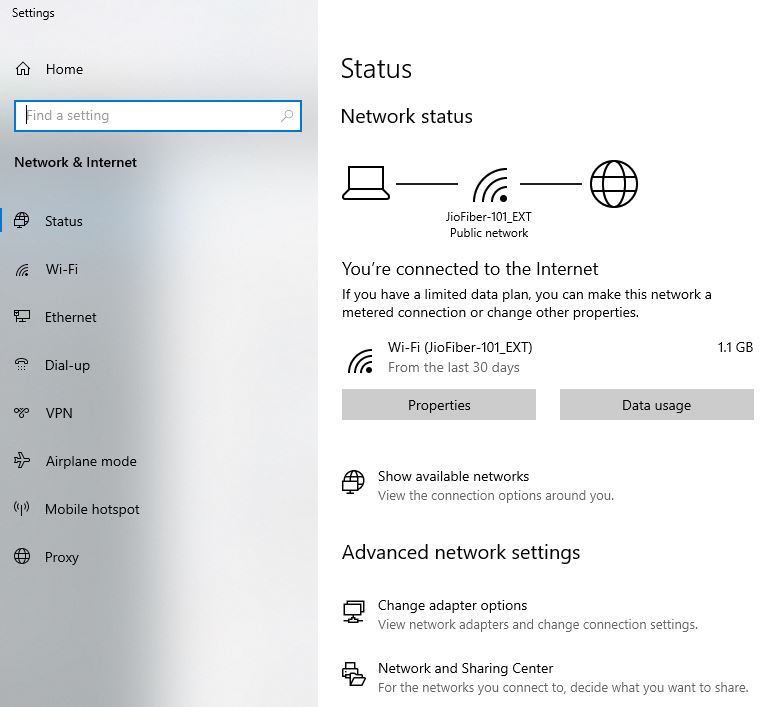
- Run Windows Troubleshooter: Navigate to Settings > Network & Internet > Status. Under “Advanced network settings,” click on “Network troubleshooter” to identify and fix issues.
3. Wi-Fi Driver Updates: Ensuring Compatibility
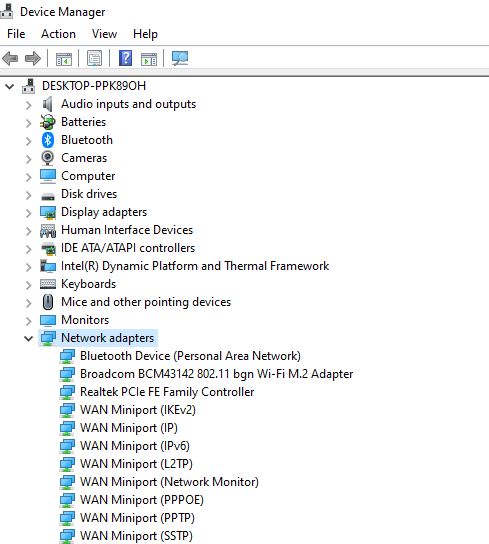
- Access Device Manager: Right-click on the Start button and select “Device Manager.”
- Expand Network Adapters: In Device Manager, expand the “Network adapters” section.
- Update Wi-Fi Driver: Right-click on your Wi-Fi adapter, select “Update driver,” and choose the option to search for updated driver software automatically.
- Restart Your Computer: After updating the driver, restart your computer to apply the changes.
4. Network Reset: Restoring Connectivity Settings

- Access Network & Internet Settings: Navigate to Settings > Network & Internet.
- Network Reset: Scroll down and click on “Network reset” under the “Advanced network settings.”
- Initiate Reset: Click on “Reset now” to initiate the network reset process.
- Restart Your Device: After the reset is complete, restart your computer to reestablish network connections.
5. DNS Configuration: Optimizing Name Resolution
- Access IP Settings: In Settings > Network & Internet, click on “Properties” under your Wi-Fi network.
- Change DNS Settings: Under “IP settings,” select “Edit” for DNS server preferences. Switch to “Manual” and enter alternative DNS server addresses like Google’s (8.8.8.8 and 8.8.4.4).
- Save Changes: Save the changes and check if the connectivity improves.
6. Power Management Settings: Preventing Sleep-Related Issues
- Access Device Manager: Follow Step 2 to access Device Manager.
- Wi-Fi Adapter Properties: Right-click on your Wi-Fi adapter, select “Properties,” and navigate to the “Power Management” tab.
- Disable “Allow the computer to turn off this device to save power”: Uncheck this option to prevent power-saving settings from affecting your Wi-Fi connection.
- Apply Changes: Save the changes and check for improvements in connectivity.
7. Firmware Updates for Wi-Fi Router: Ensuring Compatibility
- Access Router Settings: Open a web browser, enter your router’s IP address in the address bar, and log in to the router’s administration page.
- Locate Firmware Update Section: Navigate to the firmware or software update section. Follow the router manufacturer’s instructions to update the firmware.
- Restart Router: After updating, restart your router to apply the changes.
8. Check for Interference: Analyzing Signal Quality
- Check Nearby Networks: In Settings > Network & Internet > Wi-Fi, check for available networks. Identify if there are many networks on the same channel.
- Change Wi-Fi Channel: Access your router’s settings and change the Wi-Fi channel to a less congested one.
- Reconnect Devices: After making changes, reconnect your Windows 11 device to the Wi-Fi network.
9. Security Software Check: Firewall and Antivirus Configuration
- Access Windows Security Settings: In Settings, click on “Privacy & Security” and select “Windows Security.”
- Firewall and Network Protection: Under “Firewall & network protection,” ensure that your security software is not blocking your Wi-Fi connection.
- Check Antivirus Software: Review your antivirus software settings and make sure it’s not causing connectivity issues.
- Temporary Disabling: Temporarily disable your antivirus to check if it’s the source of the problem.
10. Windows 11 Updates: Keeping Your System Current
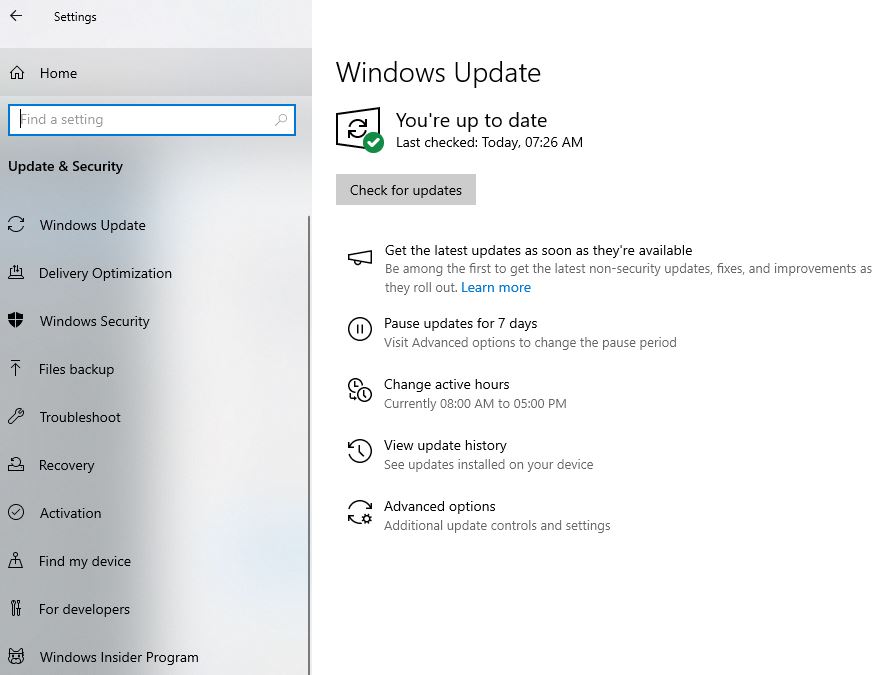
- Check for Windows Updates: Type “Windows Update” in the Windows search bar and select the utility from the results.
- Check for Updates: Click on “Check for updates” and install any pending updates for your operating system.
- Restart Your Device: After updating, restart your computer to apply the changes.
Conclusion:
A Seamless Connection on Windows 11
Troubleshooting and fixing Wi-Fi issues on Windows 11 may require a combination of these strategies. By systematically addressing potential problems, users can optimize their Wi-Fi connectivity and enjoy a seamless online experience. If issues persist, consulting with the device manufacturer’s support or seeking guidance from Microsoft’s official support channels can provide additional assistance.
Remember, maintaining a reliable Wi-Fi connection involves both proactive measures and reactive troubleshooting. Regularly updating drivers, checking network settings, and staying vigilant against potential interferences contribute to a consistently smooth connection. With these comprehensive solutions, you can ensure that your Windows 11 device navigates the waves of the digital world with ease, delivering a lightning-fast and reliable Wi-Fi experience.