Windows 11, with its sleek interface and enhanced features, continues to be a preferred operating system for many users. However, like any operating system, Windows 11 can accumulate temporary files over time, leading to potential slowdowns and storage inefficiencies. In this comprehensive guide, we’ll explore the step-by-step process on how to clear temporary files in Windows 11, ensuring a streamlined and efficient system.
-
Table of Contents
ToggleUtilize Built-in Storage Settings: Streamlining with a Click
Windows 11 provides a user-friendly interface to help you clear temporary files and free up space. Follow these steps:

- Open Settings: Click on the Windows icon in the taskbar or press the Windows key on your keyboard. Select the “Settings” gear icon to open the Settings menu.
- Go to System: In the Settings menu, choose “System” from the left sidebar. This will open a submenu with various options.
- Select Storage: Click on “Storage” to access storage-related settings.
- Free Up Space: Under the Storage menu, you’ll see a “Free up space now” option. Click on it.
This built-in tool will analyze your system and present a list of items you can safely remove, including temporary files, system cache, and more. Check the boxes next to the items you want to delete, and click “Remove files” to clear the selected temporary files.
-
Disk Cleanup: Time-Tested Cleanup Tool
The Disk Cleanup tool is a classic Windows feature that remains effective in Windows 11. Here’s how to use it:

- Open File Explorer: Press the Windows key + E to open File Explorer.
- Access Disk Cleanup: Right-click on the drive you want to clean (typically C:), and select “Properties.”
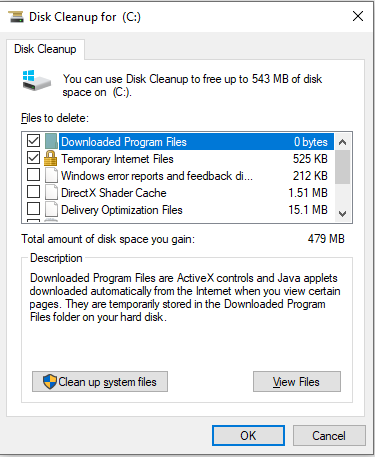
- Initiate Cleanup: In the Properties window, click on the “Disk Cleanup” button. This will analyze the drive and present a list of files you can delete.
- Choose File Types: In the Disk Cleanup dialog box, select the types of files you want to delete, including temporary files. Click “OK” to proceed.
- Confirm Deletion: After selecting the file types, click “Delete Files” to confirm and initiate the cleanup process.
-
Temporary Files Settings: Fine-Tune Your Cleanup
Windows 11 provides additional options to fine-tune the deletion of temporary files. Here’s how to access these settings:
- Open Settings: Go to Settings (Windows key + I) and navigate to “System” and then “Storage.”
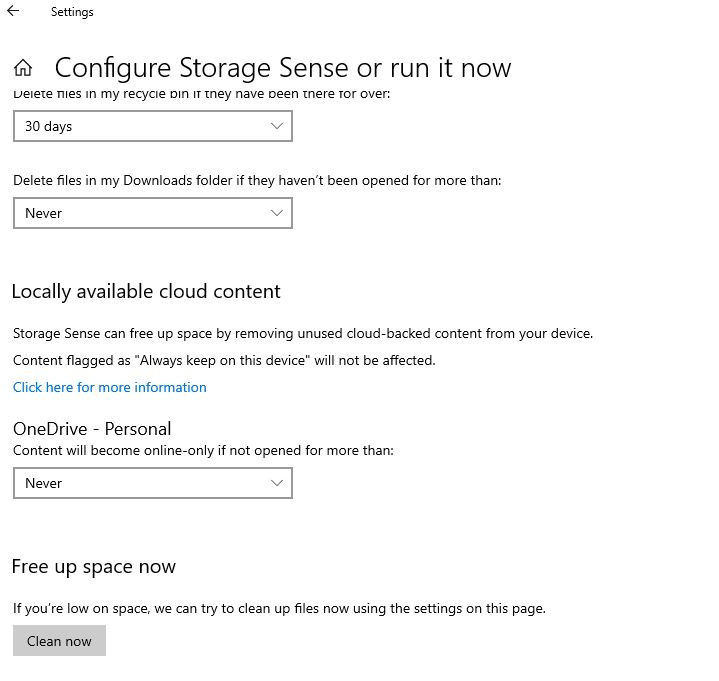
- Advanced Storage Settings: Scroll down to the bottom of the Storage settings and click on “Configure Storage Sense or run it now.”
- Adjust Settings: In the Storage Sense menu, you can enable Storage Sense to automatically free up space by deleting temporary files. Adjust the frequency and customize other settings based on your preferences.
-
Manual Deletion of Temp Files: Hands-On Approach
For users who prefer a more hands-on approach, manually deleting temporary files is an option. Follow these steps:
- Open File Explorer: Use the shortcut Windows key + E to open File Explorer.
- Navigate to Temp Folder: Go to the C: drive (or the drive where your operating system is installed), and open the “Windows” folder. Look for a folder named “Temp.”
- Select and Delete: Open the Temp folder, select all files and folders (Ctrl + A), and press the Delete key on your keyboard. Confirm the deletion.
It’s worth noting that manually deleting files from the Temp folder requires caution. Ensure that you are only deleting files that are safe to remove, as some files in the Temp folder may be in use by the system.
-
Clear Browser Cache and Temporary Files: Comprehensive Cleanup
While Windows 11 focuses on system-related temporary files, your web browser also accumulates temporary data that can be cleared. Here’s how to clear browser cache and temporary files:

- Google Chrome: Open Chrome, click on the three dots in the top-right corner, go to “More tools,” and select “Clear browsing data.” Choose the time range and types of data to clear, then click “Clear data.”
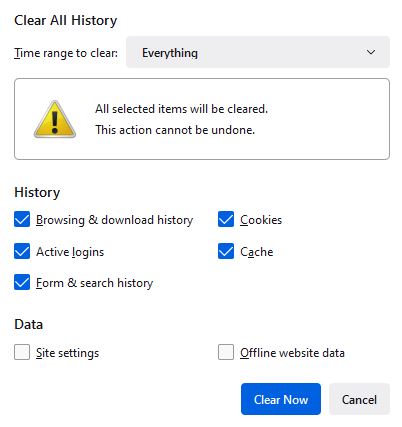
- Mozilla Firefox: Click on the three horizontal lines in the top-right corner, go to “Library,” and select “History.” Click on “Clear Recent History,” choose the time range and types of data, and click “Clear Now.”
- Microsoft Edge: Click on the three dots in the top-right corner, go to “Settings,” and choose “Privacy, search, and services.” Under “Clear browsing data,” click “Choose what to clear,” select the types of data, and click “Clear.”
Conclusion:
A Cleaner, Faster Windows 11
By following these steps, you can efficiently clear temporary files in Windows 11, ensuring a cleaner and faster system. Regular maintenance is key to keeping your operating system running smoothly, and these built-in tools and settings provide an accessible way to manage temporary files and free up valuable storage space. Incorporate these cleanup practices into your routine, and enjoy a streamlined computing experience on Windows 11.


