In this article, we are learning how to use the offset feature in Design Space. Cricut Design Space software helps you bring designs to life with the opposite feature; you can take your designs to the next level. The feature is in Design Space and can be used with all of the Cricut cutting machines. The offset tool creates a proportionally larger or proportionally smaller layer of your design whether it’s text, images, or a combination of the two, let’s learn a few examples of how the offset feature can help elevate your designs.
I made this cake topper by creating an offset layer, also commonly referred to as a shadow of this text without the shadow layer, my original text wouldn’t have been stable enough to use as a topper. I also created this congratulations banner. I used an inset to outline the shape with a foil embellishment, in other words, I created a proportionally smaller layer to outline the shape, you can learn how to make a cake topper and a car decal sticker to show you just a couple of the ways offset, expands your making capabilities for this cake topper.
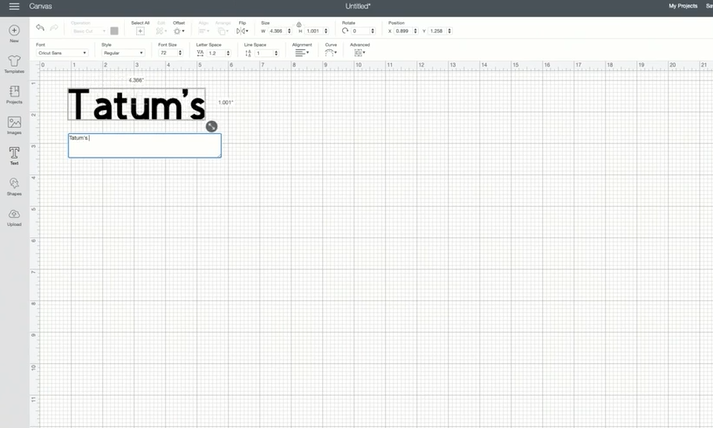
We’re going to start in design space and select text and right Tatum’s second birthday and search for the font which you want, I already know which font I want to use, so I am going to search for it, it’s called Annie and Lou, and I spread this part up, so you don’t have to wait for me to do everything, but I just want to ungroup the letters and regroup them when I have them exactly where I want them.
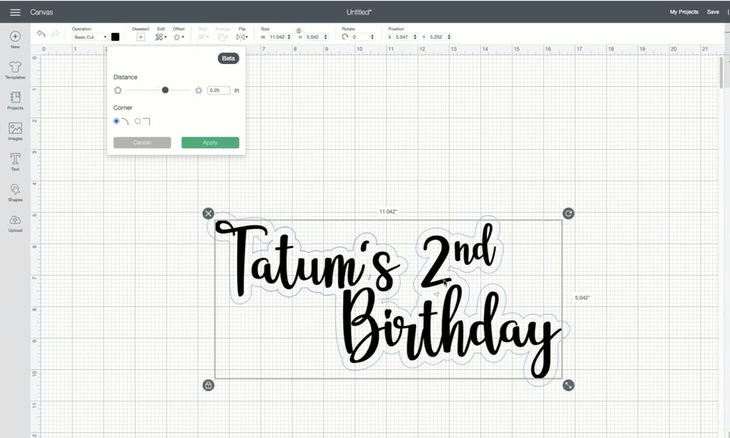
So you can see that I have arranged letters where I want them, and I’m going to add birthday. And ungroup again and make them look like they are connected by moving them together. Once I have all the letters that I want in place, I can weld them but you can see if I’m arranging how I want my cake topper and nationally to look, so I am going to select everything in a weld. Then apply the offset by clicking the offset button.
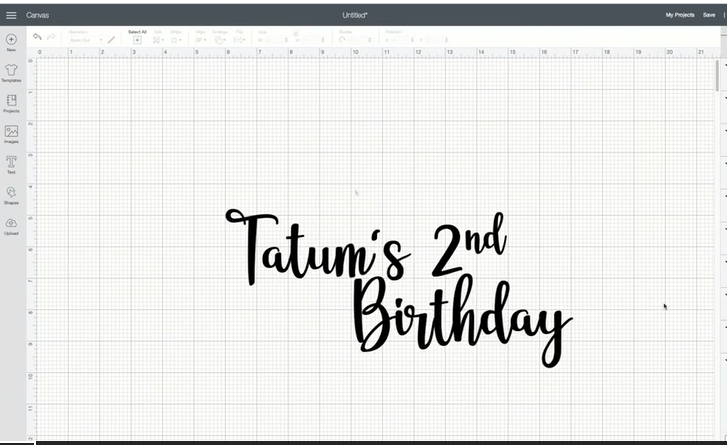
You can see that the offset feature comes with a quarter-inch standard offset for your shape or your text and you can change that. It can either be a quarter inch or you can put it manually in like I have put in 3/4 of an inch here. But it’s a little bit too wide so you can change it back to a quarter-inch and you can see the blue outline is what the offset layer is going to look like.
So you can see rounded corners here, you can also change that to be pointed if you wanted and apply the offset, and applying an offset creates another layer, so once you apply, you can now see that there are two layers but do you see how there are these little pieces in the offset layer? you can get rid of those by going to the Contour feature and you can deselect those pieces of the offset that you don’t want to show up, so uncheck those and you can now see that those pieces are gone and it will bring this backup, you can also change the color to what your actual project is going to look like.
So you can use a little bit of peach vinyl and then the back offset layer is going to be a silver poster board material that you can center those and that looks good and now you will just need to rearrange the size that you want for your cake topper, also you can change the width to about 10 inches and you can see that that was proportionately changed. So once that’s done, go ahead and click make it and you can see two layers there.
That’s your board for my offset layers; you can apply the foil poster boards and the mat that is ready to cut. Here you can put vinyl for the second layer on the mat and it’s ready to cut. Then you can go ahead and take the foil poster board off of the first mat and prep it for the cake topper.
If you want you can also cut a mirrored image of this foil poster board image so that you could use it as a backer for the cake topper and just cut the front side of the cake topper, now that the vinyl is cut you can go ahead and weed.
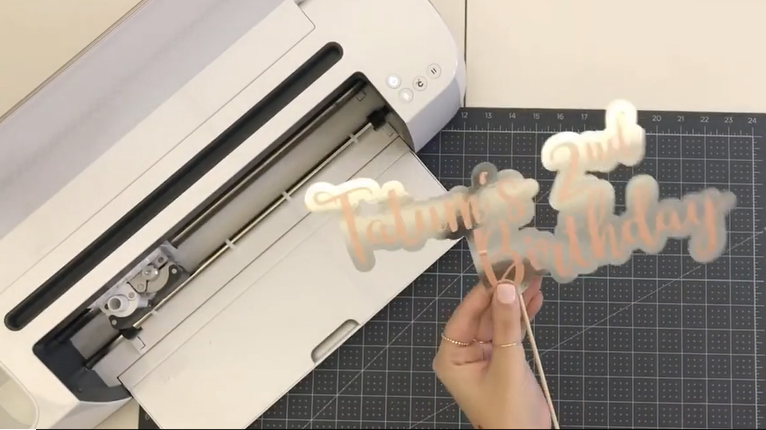
And this bond that you have chosen is a really good example of how offset can help you because there’s an apostrophe and they are thin letters to the font. And so by having the background or the offset layer, it helps you so that you can have one cohesive cake topper instead of having several different elements that would need to hold up this cake topper, now that everything’s we did all go ahead and apply my transfer tape.
We are almost done with this cake topper and you will make sure to burnish it on the front side and the backside. To make sure that the vinyl sticks to the transfer tape and then it’s ready to apply to the foil poster board, then move the transfer tape and you will see the finished product and how the nd wouldn’t have been able to stick to the rest of the cake topper? If I didn’t has that offset layer or the apostrophe? It’s nice to have different options with designing because the offset layer keeps everything together, especially for cake toppers. Here’s the finished product for the cake topper you can just add a little skewer to it and it’s ready to go.
Learn to make a monogram sticker
Cricut Design Space Software helps you bring designs to life and now with the offset feature, you can take your designs to the next level. This offset feature is in Design Space and can be used with all of the Cricut cutting machines tools creating a proportionally larger or proportionally smaller layer of your designs. Whether it’s text images or a combination of the two, It will show a little preview of what the final project will look like, You can make a monogram decal that will start in the design space and open up a new project canvas and search which image you want to use make a monogram.
Now we have an N and A you can insert that into my canvas. Select those letters to align them vertically and select all three objects and Center Brinkley, now these are three layers you need to weld into one. So once it’s one layer we are good to go and change the color to black, and then you should be ready for the offset layer. When you click on the object then select offset and it comes with a standard quarter of an inch offset. If you want to change that so you can move the slider bar to the right to increase the offset.
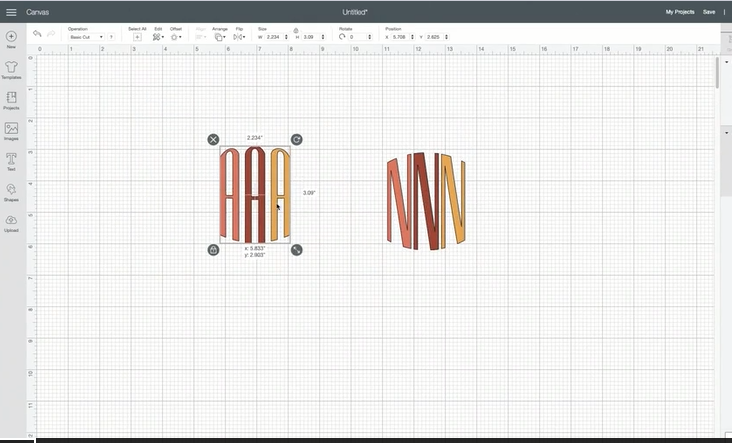
And you can see that preview with a blue line on the canvas, and as you can move it to the left, you can see that the offset becomes smaller. If you continue to move it past that metal bar then it would create an inset or make an outline.
Here you can see that these corners are now pointed, you can also change that to be rounded you can see the difference as its toggles between those two options when apply and the outline layer is the offset then select both of those two layers and the center of those now that’s centered.
You can change the offset layer to be white these two layers to color the size and the shape that you want, but I’m going to group them and we should be ready to go so we will click make it and now in mat preview, you can see that there are two layers, the white offset layer and then the black monogram layer.
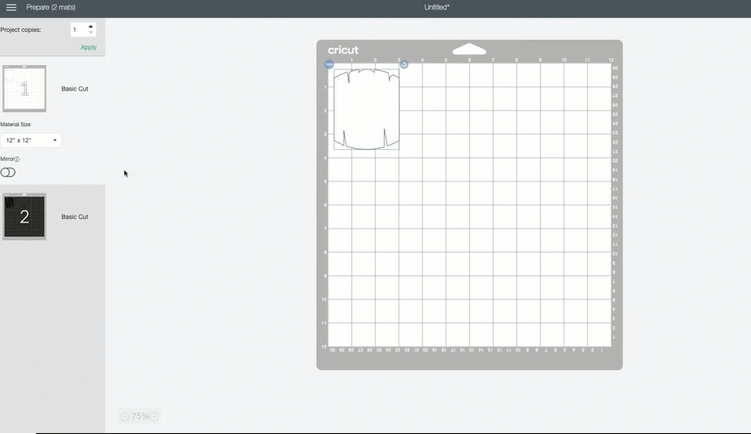
This is going to be a vinyl-layered final project you can browse for materials and search for premium vinyl and once you find that select the material, and now we are ready to cut. So I will prep my mats, I have already put the white vinyl on the mat so we can insert that into the machine and the machine will start cutting the offset layer and prep that to cut, so once that vinyl is aligned and smoothed out, then you can insert and my maker will start cutting the black monogram letters and while the black is cutting and you finished reading the white part and the black part is we are ready now to so you can unload that mat from my maker and we recommend taking the material off by turning the mat upside down and that helps prevent the curling of the material.
So you can set that aside and now you will do the same thing with the white and trim down the black vinyl and you can see where the machine made cuts, so that’s where I’m going to cut the excess material off and just like the white, I am going to lead the back part, which is a little bit more intricate than the white offset layer, So I am using my weeding tool here to just try to grab the corner and peel off the excess and the only thing I have left to weed is inside. For the next step, I am going to take some transfer tape and measure out how much transfer tape the need for this decal and try to consider the rest that matures of that transfer tape, so I am just trimming it down to fit exactly how much I need.
And then I can completely take the transfer tape off the transfer tape backer and set it on top of the black vinyl again. I am doing a layered vinyl project so I want to start with the top layer of the final. So once the transfer tapes are on top of my decal, or my design, my vinyl design, then I will use a scraper to burnish the vinyl onto the transfer tape. So I am going to go in a few different directions, make sure it’s stuck on there well and flip it over and also burnish the back side of the final all with the goal of getting the vinyl to stick to the transfer tape.
So sometimes you have to use a scraper tool to help you do that. So I’ll take the black vinyl off, the black vinyl backer, and now you can see that the transfer tape has the black vinyl on it now I’m going to transfer that black vinyl onto the offset layer or the white vinyl that we cut out and try to align that in the center and then I can use my scraper tool, try to get the black vinyl on the way offset.
If I wanted a black decal on my car, windows on cars are darker, they are black, or they are tinted. So if I want it to pop a little bit more, I can use this white offset layer to help me do those. So it’s a nice way to still get what I want just by layering the vinyl and it’s all one sticker, it’s not necessary to transfer tape when I transfer it onto the window. I can just peel that into one piece instead of the individual letters. There are so many cool things you can design and make with this offset feature from stickers and clothing embellishments.
