
A robust and optimized Wi-Fi connection on your laptop is essential for a smooth online experience. Whether you’re working, streaming, or gaming, slow Wi-Fi speeds can be a significant bottleneck. In this comprehensive guide, we’ll explore effective strategies to optimize Wi-Fi on your laptop, ensuring you get the most out of your wireless network.
-
Update Your Wi-Fi Drivers: Ensure Compatibility and Performance
Outdated or incompatible Wi-Fi drivers can hinder your laptop’s ability to connect and perform optimally. Follow these steps to update your Wi-Fi drivers:
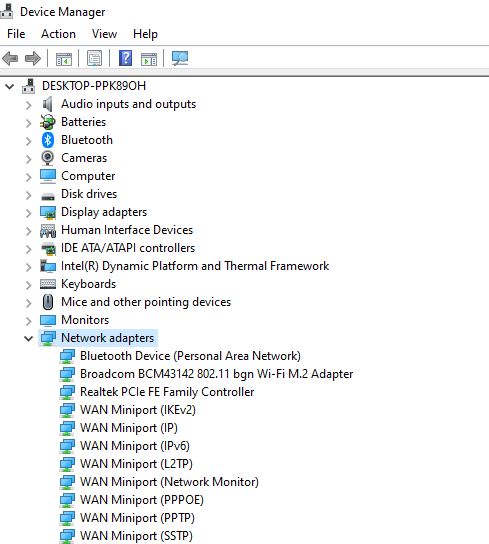
- Access Device Manager: Right-click on the Start menu and select “Device Manager.”
- Locate Network Adapters: Expand the “Network adapters” section to find your Wi-Fi adapter.
- Update Drivers: Right-click on your Wi-Fi adapter and select “Update driver.” Choose to search for updated driver software automatically.
Regularly updating your Wi-Fi drivers ensures compatibility with the latest standards and improves overall performance.
-
Adjust Power Settings: Balance Performance and Battery Life
Laptop power settings can impact Wi-Fi performance. By adjusting these settings, you can strike a balance between performance and battery life. Follow these steps:
- Access Power Options: Right-click on the battery icon in the system tray and select “Power Options.”
- Choose a Balanced Plan: Select a balanced power plan to optimize performance and extend battery life.
- Modify Advanced Power Settings: Click on “Change advanced power settings” to access additional settings. Ensure that the wireless adapter settings are optimized for maximum performance.
Balancing power settings ensures that your laptop’s Wi-Fi connection remains efficient without sacrificing battery life.
-
Select the Right Wi-Fi Network: Prioritize Quality Connections
Choosing the right Wi-Fi network is crucial for optimal performance. Follow these steps to ensure you connect to a high-quality network:
- Check Signal Strength: Before connecting, check the signal strength of available Wi-Fi networks. Opt for a network with a strong signal.
- Choose 5 GHz Networks: If available, connect to a 5 GHz Wi-Fi network instead of a 2.4 GHz one for faster speeds and less interference.
- Secure Password-Protected Networks: Connect to secure, password-protected networks to ensure stability and security.
Prioritizing high-quality networks enhances your laptop’s Wi-Fi experience.
-
Optimize Network Card Settings: Fine-Tune for Performance
Adjusting advanced settings for your laptop’s network card can significantly impact Wi-Fi performance. Follow these steps to optimize network card settings:
- Access Device Manager: Right-click on the Start menu and select “Device Manager.”
- Locate Network Adapters: Expand the “Network adapters” section to find your Wi-Fi adapter.
- Modify Advanced Settings: Right-click on your Wi-Fi adapter and select “Properties.” Navigate to the “Advanced” tab and adjust settings like Roaming Aggressiveness and Transmit Power.
Fine-tuning these settings can lead to improved connectivity and speed.
-
Use a Wi-Fi Analyzer: Identify and Avoid Interference
Wi-Fi interference from neighboring networks or electronic devices can degrade performance. Utilize a Wi-Fi analyzer tool to identify interference and adjust your laptop’s settings accordingly:
- Download a Wi-Fi Analyzer App: Various apps are available for both Windows and macOS. Choose one that suits your platform.
- Identify Less Congested Channels: Use the analyzer to identify less crowded Wi-Fi channels. Adjust your laptop’s settings to use a less congested channel.
Minimizing interference ensures a cleaner Wi-Fi signal and better performance.
-
Disable Unnecessary Background Apps: Conserve Bandwidth
Background applications running on your laptop can consume valuable bandwidth, affecting Wi-Fi performance. Follow these steps to manage background apps:
- Access Task Manager: Right-click on the taskbar and select “Task Manager.”
- Identify and Disable Apps: In the “Processes” or “Startup” tab, identify and disable unnecessary background apps.
By limiting background app activity, you reserve more bandwidth for essential tasks.
-
Upgrade Your Wi-Fi Card: Enhance Speed and Compatibility
If your laptop allows for hardware upgrades, consider replacing the existing Wi-Fi card with a more advanced and compatible one. Follow these steps:
- Check Compatibility: Ensure the new Wi-Fi card is compatible with your laptop model.
- Access and Replace: Open the back panel of your laptop (refer to your laptop’s manual) and replace the existing Wi-Fi card with the new one.
Upgrading the Wi-Fi card can result in faster speeds and improved performance.
-
Use a Wired Connection for Intensive Tasks: Ensure Stability
For tasks that demand a stable and high-speed connection, consider using a wired Ethernet connection. Follow these steps to connect your laptop via Ethernet:
- Connect Ethernet Cable: Plug one end of the Ethernet cable into your laptop’s Ethernet port and the other end into a compatible router or modem.
- Disable Wi-Fi: Temporarily disable your laptop’s Wi-Fi to ensure it uses the wired connection.
A wired connection is ideal for activities like gaming or large file downloads that require maximum stability.
Conclusion:
Elevate Your Laptop’s Wi-Fi Performance
By implementing these strategies and optimizations, you can ensure that your laptop’s Wi-Fi connection operates at its full potential. Experiment with these tips, incorporating screenshots to guide you through each optimization step. Whether you’re working, streaming, or engaging in online activities, an optimized Wi-Fi connection on your laptop ensures a responsive and reliable online experience. Take control of your connectivity, and enjoy the benefits of lightning-fast internet speeds on your laptop.