
Windows 11, the latest operating system from Microsoft, comes with a sleek interface and numerous features to enhance user experience. However, to truly harness its potential, optimizing your internet settings is essential. In this guide, we will walk you through the step-by-step process of optimizing internet settings on Windows 11, accompanied by screenshots for clarity.
Check Current Internet Connection Status
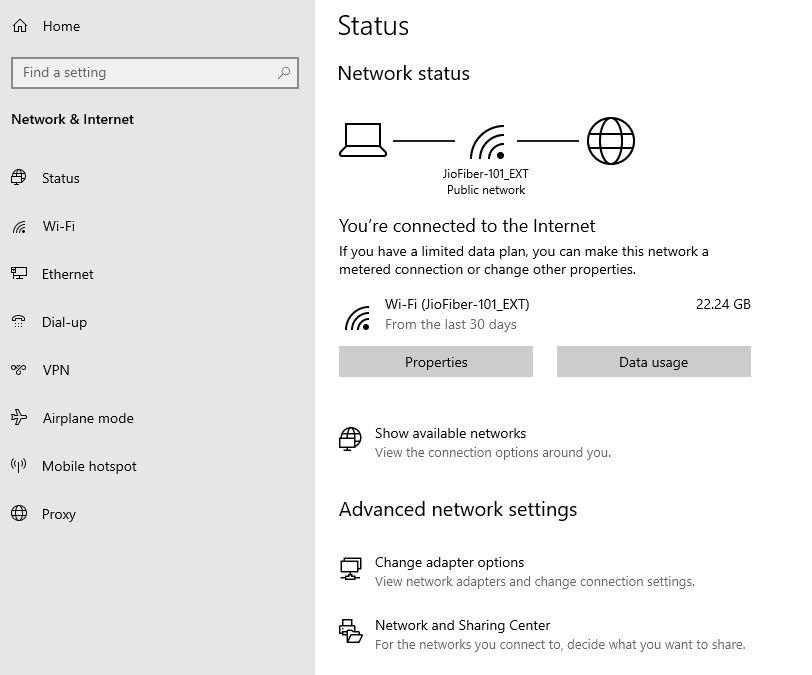
Before diving into optimizations, it’s crucial to assess your current internet connection status. Click on the network icon in the taskbar to view available networks. Check the signal strength, connection type (wired or wireless), and ensure you are connected to the network you intend to optimize.
Connect to a 5GHz Wi-Fi Network
Windows 11 supports both 2.4GHz and 5GHz Wi-Fi bands. The latter offers faster speeds and reduced interference, making it ideal for activities like gaming and streaming. To switch to the 5GHz band, navigate to “Settings” > “Network & Internet” > “Wi-Fi” and select your preferred network under “Preferred bands.”
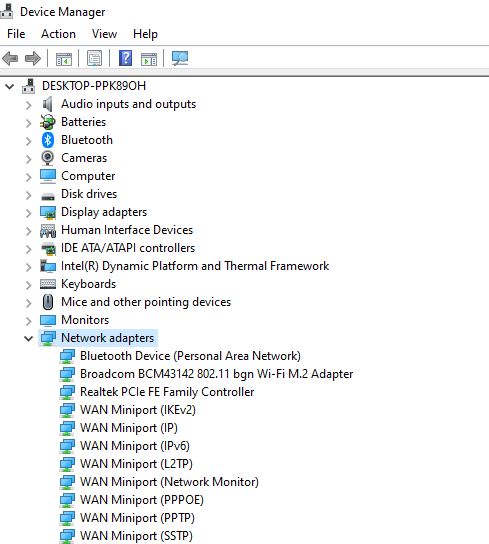
Update Network Drivers
Outdated network drivers can impact performance. Keep your drivers up to date by visiting the official website of your device manufacturer or using Windows Update. Updated drivers often include bug fixes and improvements for better internet connectivity.
Optimize Windows Update Delivery
Windows 11 includes a feature called Windows Update Delivery Optimization (WUDO) that can share updates with other devices on your network. While this can be helpful, it might affect your internet speed. To adjust these settings, go to “Settings” > “Windows Update” > “Advanced options” > “Delivery Optimization.”
Adjust DNS Settings
Customizing your DNS (Domain Name System) settings can improve internet speed and reliability. Navigate to “Settings” > “Network & Internet” > “Wi-Fi” or “Ethernet” and click on your connected network. Under “IP settings,” select “Edit” and set the DNS server addresses to preferred values like Google’s (8.8.8.8 and 8.8.4.4).
Manage Background Applications
Background applications can consume bandwidth and affect internet speed. To manage these, open the Task Manager (Ctrl + Shift + Esc), go to the “Startup” tab, and disable unnecessary applications from launching at startup.
Enable Quality of Service (QoS) Settings
Windows 11 supports Quality of Service (QoS) settings, allowing you to prioritize certain types of network traffic. To access these settings, go to “Settings” > “Network & Internet” > “Ethernet” or “Wi-Fi” and click on your connected network. Under “Properties,” enable “QoS” and set your preferences.
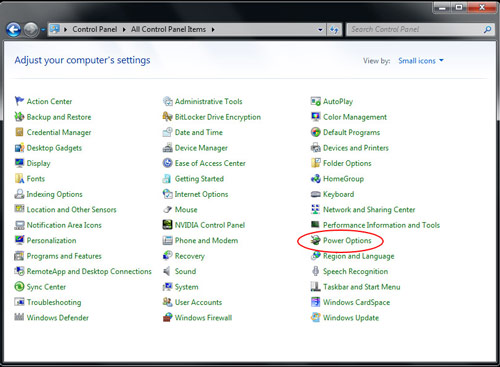
Adjust Power Management Settings
Power management settings can impact your device’s network performance. Navigate to “Settings” > “System” > “Power & sleep” and click on “Additional power settings.” Choose a power plan that aligns with your internet usage preferences and adjust advanced settings accordingly.
Check Firewall and Security Settings
Firewall settings and security configurations can influence internet access. Ensure that your firewall is configured to allow necessary network traffic. Visit “Settings” > “Privacy & Security” > “Windows Security” and review your firewall settings.
Monitor Data Usage
Windows 11 provides tools to monitor data usage, helping you identify which applications consume the most bandwidth. Go to “Settings” > “Network & Internet” > “Data usage” to view a breakdown of data consumption by each application.
Conclusion:
Optimizing your internet settings in Windows 11 is a proactive step towards ensuring a smooth online experience. By following these steps and referring to the accompanying screenshots, you can fine-tune your internet connection for optimal performance. Regularly revisit and update these settings to adapt to changes in your online activities, guaranteeing a consistently high-quality internet experience on your Windows 11 device.