
Upgrading to Windows 11 promises a fresh and enhanced computing experience, but sometimes, performance issues can arise post-upgrade. In this guide, we’ll explore effective strategies to troubleshoot and resolve performance problems after transitioning to Windows 11. Throughout the guide, consider incorporating screenshots to visually guide users through the troubleshooting steps, ensuring a smoother and more user-friendly experience.
1. Assess System Requirements: Ensuring Compatibility
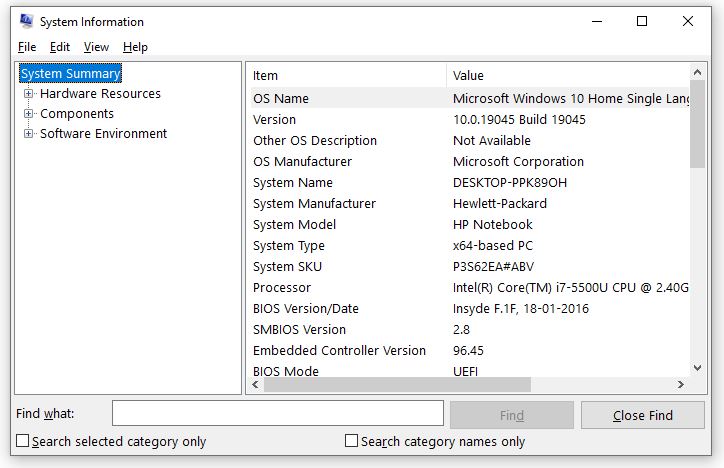
- Check System Specifications: Press Win + Pause/Break to open System Information and review your system’s specifications, especially RAM, processor, and storage.
- Compare with Windows 11 Requirements: Visit the official Microsoft website to ensure your PC meets the minimum and recommended system requirements for Windows 11.
- Upgrade Hardware if Necessary: If your hardware falls short, consider upgrading components like RAM or your storage drive for a smoother Windows 11 experience.
By verifying system compatibility, you ensure that your hardware can fully support the demands of Windows 11.
2. Update Graphics Drivers: Enhancing Visual Performance
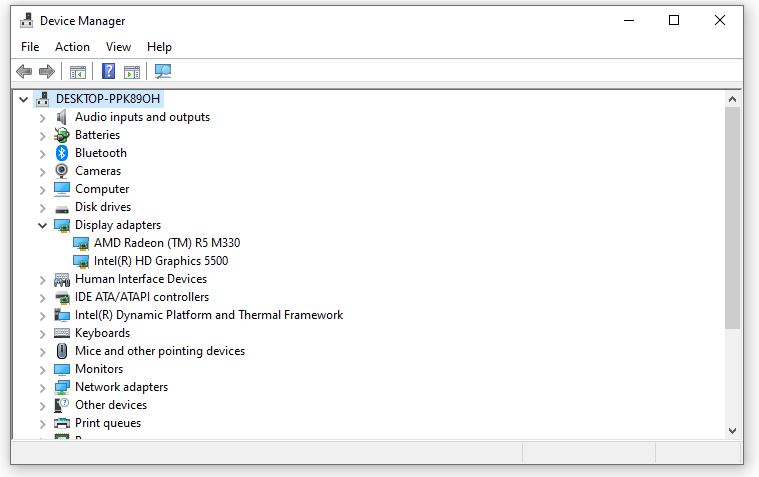
- Access Device Manager: Right-click on the Start button and select “Device Manager.”
- Update Display Adapters: Expand “Display adapters,” right-click on your graphics card, and choose “Update driver.”
- Search Automatically for Updates: Opt for the automatic search for updated driver software to ensure you have the latest graphics drivers installed.
- Restart Your PC: After updating drivers, restart your computer to apply the changes.
Updated graphics drivers can significantly improve visual performance and address compatibility issues with Windows 11.
3. Adjust Power Settings: Balancing Performance and Energy Efficiency
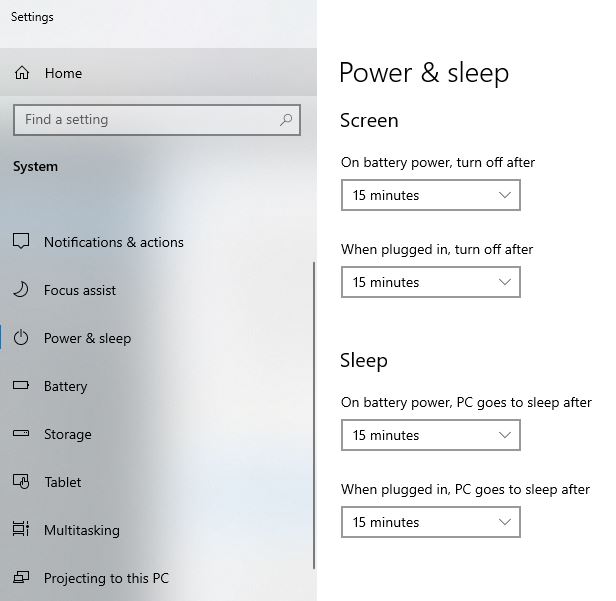
- Access Power & Sleep Settings: Go to Settings > System > Power & Sleep.
- Choose a Power Plan: Select a power plan that balances performance and energy efficiency. The “Balanced” plan is a good starting point.
- Access Advanced Power Settings: Click on “Additional power settings” to access advanced power settings.
- Modify Processor Power Management: In advanced settings, navigate to “Processor power management” and adjust settings like minimum and maximum processor state.
Customizing power settings can improve performance and prevent unnecessary energy consumption.
4. Optimize Windows Settings: Streamlining Processes
- Open Task Manager: Right-click on the taskbar and select “Task Manager.”
- Navigate to the “Startup” Tab: In Task Manager, click on the “Startup” tab to review and disable unnecessary startup programs.
- Access Privacy Settings: Go to Settings > Privacy and review app permissions to streamline background processes.
- Check Background Apps: In Settings, navigate to Privacy > Background apps and disable unnecessary apps running in the background.
By optimizing Windows settings, you reduce the load on your system, potentially resolving performance issues.
5. Utilize Windows Update: Ensuring Software Compatibility
- Access Windows Update Settings: Go to Settings > Windows Update.
- Check for Updates: Click on “Check for updates” to ensure your operating system is up to date with the latest patches and fixes.
- Install Available Updates: If updates are available, download and install them to address potential compatibility issues.
Regularly updating your system ensures you have the latest features and improvements, often resolving performance-related bugs.
6. Perform a System Scan for Malware: Ensuring Security and Stability
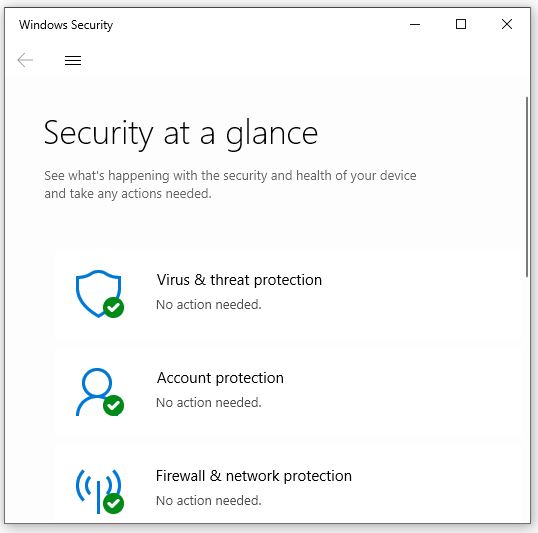
- Access Windows Security: In Settings, click on “Privacy & Security” and select “Windows Security.”
- Run a Full Scan: Under “Virus & threat protection,” run a full scan to check for malware and other security threats.
- Remove Detected Threats: If threats are detected, follow the software’s instructions to remove or quarantine them.
Malware can significantly impact system performance, so a thorough scan is essential for stability.
7. Customize Visual Effects: Balancing Aesthetics and Performance
- Access Advanced System Settings: Right-click on the Start button, select “System,” and click on “Advanced system settings.”
- Navigate to Performance Options: In the System Properties window, click on the “Settings” button under the Performance section.
- Choose Custom Settings: Select “Custom” to manually choose visual effects that are essential for your experience. Alternatively, select “Adjust for best performance” to disable unnecessary visual effects.
- Apply Changes: Click “Apply” and then “OK” to save the changes.
Customizing visual effects helps strike a balance between aesthetics and performance.
Conclusion:
A Smooth Transition to Windows 11
Upgrading to Windows 11 should enhance your computing experience, not hinder it. By following these troubleshooting steps and incorporating screenshots where necessary, you can effectively address and resolve performance issues. Remember, every system is unique, so tailor these solutions to fit your specific configuration and needs.
With a systematic approach, you can navigate and conquer performance challenges, ensuring Windows 11 operates smoothly on your upgraded PC.