Install Duplicate File Finder for Windows
Duplicate File Finder is available for download from the Microsoft Store.
Duplicate File Finder for Windows supports both Windows 11 and Windows 10.
Launch the app
Once the application is installed, launch the app following these steps:
- Click the Windows Start button
- Type “Duplicate File Finder for Windows“
- Locate the matching program entry with this app icon

- Click the entry to launch the app
For ease of access in the future, you may choose to pin the program icon to the Windows taskbar. With the app running:
- Right-click the app icon from the taskbar
- Select “Pin to taskbar“
The Main Interface
This app enables users to scan, review, and remove duplicate files, as well as similar photos and videos. The main interface provides direct access to the core features:
- Duplicate files
- Similar photos
- Similar videos
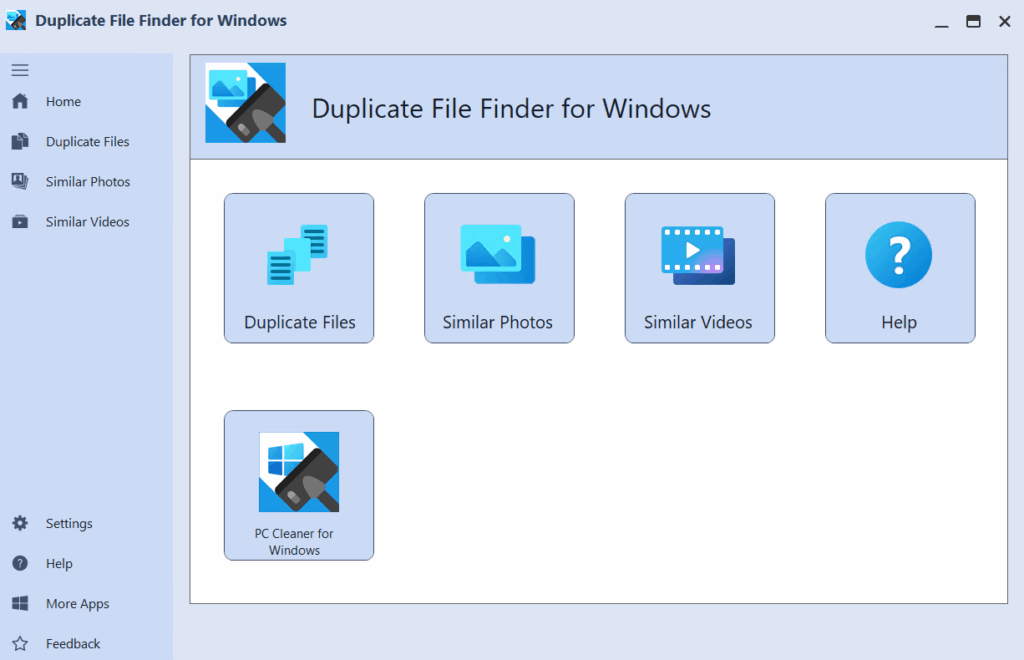
All scan and cleanup tools are also accessible from the side toolbar, which includes additional options for Program Settings, Help, and Feedback.
1. Remove Duplicate Files
The app help you uncover and eliminate duplicate files that are hogging disk space. The scan results not only lists all duplicates found but also itemizes each file under a particular group of duplicates for further inspection and selection. This ensures that you exclusively remove the intended files, optimizing storage space while retaining full control over your deletions.
Select folders for scanning
Before starting a duplicate file scan, select one or more folders to include in the analysis. The app provides quick access to commonly used directories such as Documents, Downloads, Music, Pictures, Videos, and the current user folder (Personal Folder).

Add a folder for scanning
To add a preconfigured folder, click the Add button next to the folder name. The selected folder will appear in the “Folders to Scan” list.
To add a custom folder not listed by default, click the Add Folders icon in the upper-right corner of the window. Browse to the desired folder, select it, and click OK to confirm.
Remove a folder
To remove a folder from the scan list, click the Remove ![]() button next to the folder’s name. The folder will be immediately excluded from the scan.
button next to the folder’s name. The folder will be immediately excluded from the scan.
Start the scan
When ready, click the Start Scan button to begin scanning for duplicate files. The scan duration depends on the number and size of the folders selected.
Reviewing Scan Results
Once the scan is complete, the results will display all detected duplicate files, grouped by identical content. Duplicate groups are listed in the left panel, while the corresponding files within each group are shown in the right panel.

Filtering Scan Results
To refine the view, use the filtering and sorting options located at the top of the scan results:
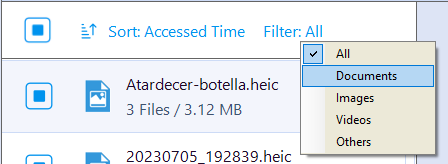
1. Show File Types
Choose a category to filter the displayed results:
All Files: Show all duplicate files.
Documents: Limit results to office documents, text files, and PDFs.
Images: Show duplicate image files only.
Videos: Show duplicate video files only.
Others: Display all remaining file types not included above.
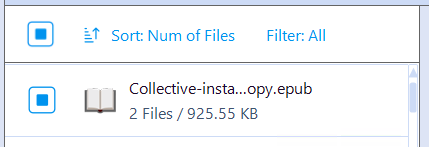
2. Sort By
Sort duplicate file groups using the following criteria, in either ascending or descending order:
File Name
File Size
Number of Duplicates
Accessed Time
Created Time
Modified Time
Select Duplicates for Removal
Work with a single group of duplicates
Each duplicate group contains two or more files with identical content. These files may have different names or file types. To review a specific group, select it from the list on the left. The corresponding files will appear in the right panel, where you can examine each by folder location, file name, and file size.
For each file in the group, the following actions are available:
Mark for Deletion: Use the checkbox to the left of the file to select it for removal.
Move to Recycle Bin: Right-click the file and select “Move File to Recycle Bin”.
Open File Location: Right-click the file and choose “Open File Location” to view it in Windows File Explorer.
The Smart Batch Selection feature
Instead of manually selecting duplicates in each group, you can use the Smart Batch Selection feature. Click the large checkbox next to a duplicate group to activate it. This feature automatically selects the best file to keep and marks the rest for deletion.
To apply Smart Batch Selection to all groups at once, click the selection box in the header row of the scan results.
Clean or Delete Duplicates
The app offers two methods to remove duplicate files:
Clean: Moves selected files to the Recycle Bin, allowing recovery until the Bin is emptied.
Delete: Permanently removes files by overwriting their data on disk, making recovery impossible.

To proceed, use the dropdown menu to select your preferred removal method.
Select Folder for Scanning
To select folders for Similar Photos scanning, follow the same steps outlined in the Remove Duplicate Files section. You may add one or more folders to define the scan scope, including commonly used folders like Documents, Pictures, or custom directories of your choice.
Review Scan Results
After the scan is complete, results are displayed in grouped format based on visual similarity. Each group contains images that share a high degree of resemblance, even if they differ in name, size, or resolution.

Unlike duplicate file scans, similar photo groups display the corresponding images directly beneath each group header. Use the up/down arrow beside each group to expand or collapse the file list as needed.
Sort Scan Results
You can sort the groups of similar photos using any of the following criteria, in either ascending or descending order:
File Name
File Size
Last Accessed Time, Creation Time, or Last Modified Time
Image Width or Height
Select Similar Photos for Removal
Review a Single Group
Each group contains two or more photos with visually similar content. To review a group, click the toggle arrow to expand it. All related files will appear beneath the group header, where you can compare image name, file size, resolution (width and height), and color depth.

Available Actions per File
For each photo in the group, the following options are available:
Mark for Deletion: Use the checkbox to select the file for removal.
Move to Recycle Bin: Right-click the file and choose Move File to Recycle Bin.
Open File Location: Right-click the file and select Open File Location to view it in Windows File Explorer.
Auto Selection
Instead of selecting files manually, you can use the Auto Selection feature to streamline the process. Click the large checkbox next to a group header to activate auto selection for that group. The app will retain the best-quality image and mark the rest for removal.
To apply auto selection to all groups, click the Auto Select button in the header row.
To cancel all selections made by the Auto Select feature, click Unselect All.
Clean or Delete Similar Photos
The app offers two methods to remove similar photos:
Clean: Moves selected files to the Recycle Bin, allowing recovery until the Bin is emptied.
Delete: Permanently removes files by overwriting their data on disk, making recovery impossible.
To proceed, use the dropdown menu to select your preferred removal method.
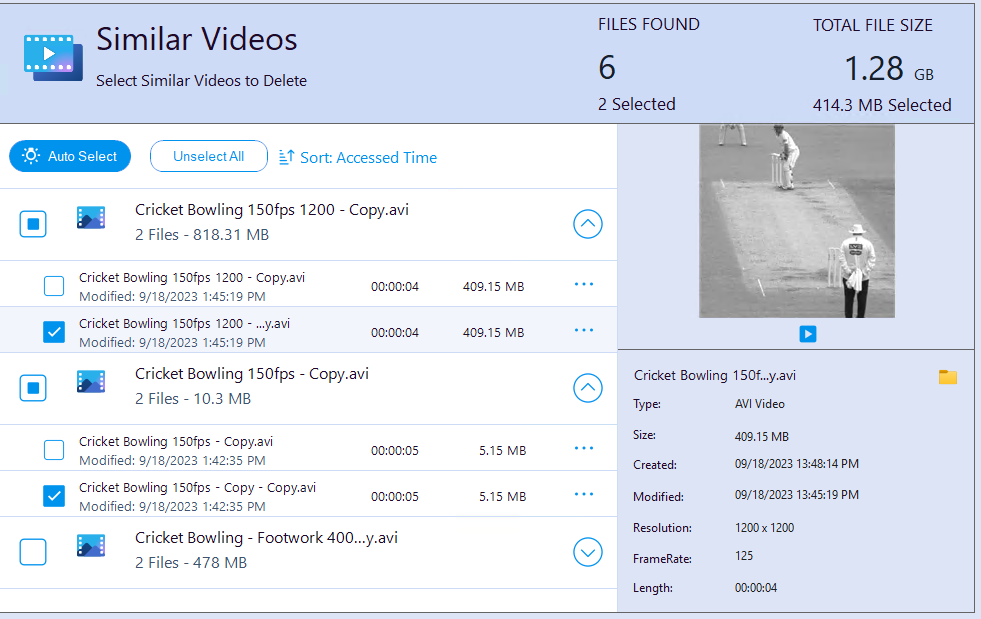
3. Remove Duplicate/Similar Videos
The Similar Videos feature helps identify videos that look nearly the same, even if they have different file names, resolutions, durations, or formats. It works by extracting key visual frames from each video and generating a perceptual hash—a digital summary of its visual content. By comparing these hashes, the app can detect video files that are visually similar, making it easier to clean up redundant footage from your library.
Getting Started with Similar Videos
To scan and clean similar videos:
Select Folders — Choose the folders you want to include in the scan.
Start the Scan — Click Start Scan under Similar Videos.
Review Results — Groups of similar videos will be displayed based on visual similarity.
Select Files — Use manual checkboxes or the Auto Select feature to mark files for removal.
Clean Up — Move selected files to Recycle Bin or delete them permanently.
The scanning interface, sorting options, and selection tools work the same way as for Similar Photos. For detailed instructions on folder selection, reviewing results, and using Auto Select, please refer to the Similar Photos section above.
