DOCX Editor for Windows - Help File
Discover the Ultimate Free Alternative to Microsoft Word! Open, view, edit, and create DOCX documents effortlessly. Support for DOCX, RTF, and TXT file formats and more. Enjoy comprehensive text formatting, customizable headers and footers, and easy table and image insertion. Enhance collaboration with track changes and secure your documents with password protection and editing restrictions. Export to PDF and HTML formats with ease and ensure perfect printouts with the print preview feature.
– Advertisement –
Product Support
Have questions regarding the functions of the product, license acquisition, or want to provide feedback? We love to hear from you:
- Email our support team: huxsoft[at]outlook.com (replace [at] with @)
- If you encounter an issue while using the app, please explain the nature of the problem and provide the steps to reproduce it.
- If the issue is related to a particular document, consider attaching the file to your email.
Our knowledgeable and friendly support team will get back to you in a timely manner.
1. Quick Start
Launch Window
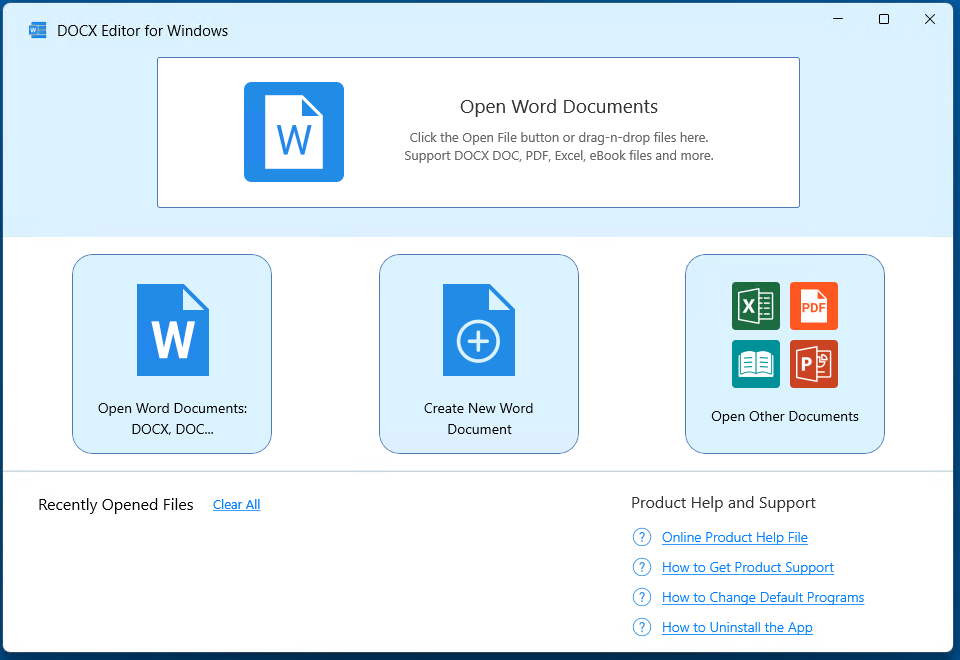
Use the Launch Window to access the core features of the app:

- Open existing Word documents
- Create new blank Word documents
- Open other documents, files, and image files
- Access to product help file and product support information
2. Basic Operations
The following instructions are applicable inside the DOCX Editor window.
Creating a New Document
To create a new document in the DOCX Editor:

- Open the application.
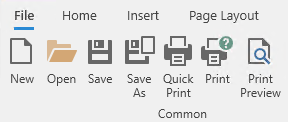
- Click on File in the menu bar.
- Select New from the dropdown menu.
- A blank document will appear, ready for you to start typing.
You can also use the keyboard shortcut Ctrl + N to quickly create a new document.
Opening Existing Documents
To open an existing document:
- Click on File in the menu bar.
- Select Open.
- Navigate to the location of your document, select the file, and click Open.
Supported file types include .docx, .rtf, .txt, and more. You can also use the keyboard shortcut Ctrl + O to open a document.
Saving Documents
To save your document:
- Click on File in the menu bar.
- Select Save or Save As.
- Choose the location where you want to save the document.
- Enter a file name and select the desired format (e.g., .docx, .rtf, .txt).
- Click Save.
To quickly save your document, use the keyboard shortcut Ctrl + S. The DOCX Editor also features an autosave function that periodically saves your work to prevent data loss.
– Advertisement –
3. Text Editing and Formatting
Basic Text Operations
To perform basic text operations in the DOCX Editor:
- Typing: Click where you want to insert text and start typing.
- Deleting: Use the Backspace or Delete keys to remove text.
- Selecting: Click and drag your mouse over the text, or hold Shift and use arrow keys.
Text Formatting
To format text:

- Select the text you want to format.
- Use the toolbar to apply formatting options:
- Font Style: Change the font style from the dropdown menu.
- Font Size: Adjust the font size using the size dropdown.
- Bold, Italic, Underline: Click B, I, or U in the toolbar or use Ctrl + B, Ctrl + I, or Ctrl + U.
- Font Color: Change the text color using the color picker.
- Highlighting: Highlight text using the highlight tool.
Paragraph Formatting
To format paragraphs:

- Select the paragraph you want to format.
- Use the toolbar to apply paragraph formatting options:
- Alignment: Align text to the left, center, right, or justify using the alignment buttons or Ctrl + L, Ctrl + E, Ctrl + R, Ctrl + J.
- Line Spacing: Adjust line spacing from the line spacing dropdown menu.
- Indentation: Increase or decrease indentation using the indent buttons or Ctrl + M and Ctrl + Shift + M.
- Bullet Points: Add bullet points or numbering using the bullet and numbering buttons.
– Advertisement –
4. Working with Document Elements
Tables
To insert and edit tables in the DOCX Editor:

- Click on Insert in the menu bar.
- Select Table from the dropdown menu.
- Choose the desired number of rows and columns, and click OK
- To format the table, use the table tools that appear in the toolbar.
You can adjust table properties such as cell size, borders, and shading using the formatting options.
Images
To add and format images:

- Click on Insert in the menu bar.
- Select Picture to insert an image.
- Choose the image you want to insert.
- To format the image, use the tools that appear in the Picture Tools > Format toolbar.

You can resize, rotate, and apply styles to images and shapes to enhance your document’s visual appeal.
Headers and Footers
To insert and customize headers and footers:

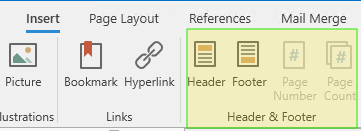
- Click on Insert in the menu bar.
- Select Header or Footer from the dropdown menu.
- Enter the desired text or elements, like Page Number, Page Counter, text, or image.

You can customize headers and footers by adjusting their size, adding images or shapes, and applying different styles to match your document’s design.
– Advertisement –
5. Exporting and Printing
Exporting Documents
To export your document to different formats:
- Click on File in the menu bar.
- Select Save As.
- Choose the location where you want to save the file.
- Select the desired export format from the dropdown menu (e.g., PDF, HTML).
- Click Save to export the document.
Exporting your document allows you to share it in different formats, ensuring compatibility with various applications and devices.
Printing Documents
To print your document:
- Click on File in the menu bar.
- Select Print to open the print dialog box.
- Choose your printer and configure the print settings.
- Click Print to print your document.
The print preview feature allows you to see how your document will look on paper before printing, helping you make any necessary adjustments.
6. Advanced Features
Track Changes
To track changes in your document:

- Click on Review in the menu bar.
- Select Track Changes to enable the feature.
- Make the necessary edits to your document. All changes will be highlighted.
- To accept or reject changes, use the Accept and Reject buttons in the Review tab.
Track Changes helps you keep track of edits made to a document, making it easier to review and collaborate with others.
Document Protection
To protect your document:
- Click on File in the menu bar.
- Choose the desired protection options, such as Encrypt with Password.
- Follow the prompts to set up your protection preferences.
Document protection helps you secure your documents by setting permissions and restricting unauthorized access or editing.
More Guides and Tips
– Advertisement –


