2. Before You Begin (Prerequisites)
Before connecting your Android device to your Windows PC, make sure the following requirements are met. These steps apply to all connection methods (USB and Wi-Fi).
Android Debug Bridge (ADB)
Android Debug Bridge (ADB) must already be installed on your Windows PC.
ADB is part of the official Android developer tools provided by Google.
The app will check for ADB and prompt you if it cannot be found.
Note: This app uses ADB for device communication but does not install or distribute ADB. Visit this help file section to learn more about ADB.
Android Device Requirements
An Android device running Android 8.0 or later (Wi-Fi features vary by version).
The device must be unlocked during connection.
Developer Mode must be enabled.
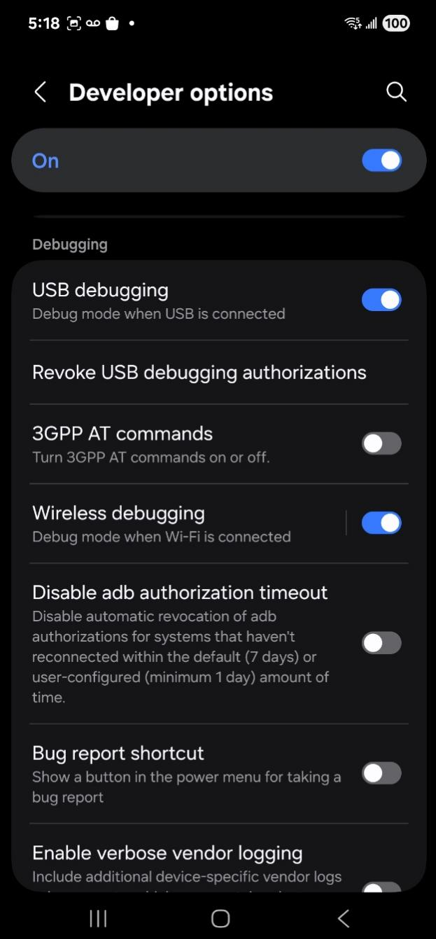
USB debugging must be turned on.
You can follow Google’s official instructions here:
https://developer.android.com/studio/debug/dev-options#Enable-debugging
USB Cable Requirements
A data-capable USB cable is required.
Charging-only cables will not work.
For desktop PCs, it is recommended to connect the cable directly to a USB port on the PC itself (avoid hubs or adapters when possible).
Windows PC Requirements
Windows 10 or Windows 11 (x64).
The Android device should be automatically recognized by Windows when connected.
No additional drivers are typically required for modern Android devices.
Network Requirements (For Wi-Fi Connections)
The Android device and Windows PC must be connected to the same local network.
Wi-Fi connections are supported:
Directly on Android 11 and later
After initial USB pairing on Android versions earlier than 11
Once these prerequisites are met, you can proceed to connect your Android device using USB or Wi-Fi in the next section.
3. Method 1: Connect via USB Cable (All Android Versions)
Connecting your Android device to your Windows PC using a USB cable is the default and most reliable connection method. This method is supported on all Android versions and is also required as an initial setup step for some Wi-Fi connections on older Android devices.
Step 1: Connect the Android Device to Your PC
Use a data-capable USB cable to connect your Android device to the Windows PC.
Avoid charging-only cables, as they do not support data transfer.
If you are using a desktop PC, connect the cable directly to a USB port on the back of the PC whenever possible.
Step 2: Allow USB Debugging on the Android Device
Unlock your Android device.
When prompted with “Allow USB debugging?”, tap Allow.
It is recommended to check “Always allow from this computer” to avoid repeated prompts.
If no prompt appears:
Make sure Developer Mode and USB debugging are enabled.
Disconnect and reconnect the USB cable if needed.
Step 3: Verify Device Detection in the App
Return to the app on your Windows PC.
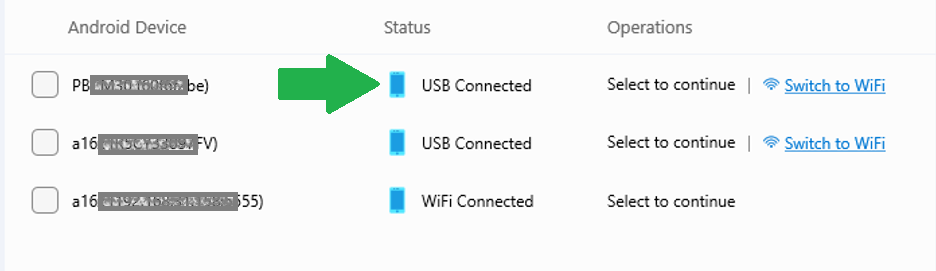
Your Android device should appear in the device list with a USB Connected status.
If the device does not appear, click Refresh Device List to scan again.
Step 4: Select the Device
Select the connected Android device from the list.
Click Continue to proceed to APK installation.
Notes
USB connection is required for initial pairing on Android versions below 11 if you plan to use Wi-Fi later.
You can continue using USB for APK installation without switching to Wi-Fi.
Once the device is connected successfully, you are ready to install APK files or proceed to Wi-Fi connection options if supported.
4. Method 2: Connect via Wi-Fi (Android 11 and Later)
Wi-Fi connection allows you to install APK files without keeping a USB cable connected. This method is supported on Android 11 and later.
For Android versions below 11, an initial USB connection is required before Wi-Fi can be used.
Before proceeding, ensure:
Your Android device and Windows PC are on the same local network.
Developer Mode and USB debugging are enabled on the Android device.
ADB is available on your Windows system.
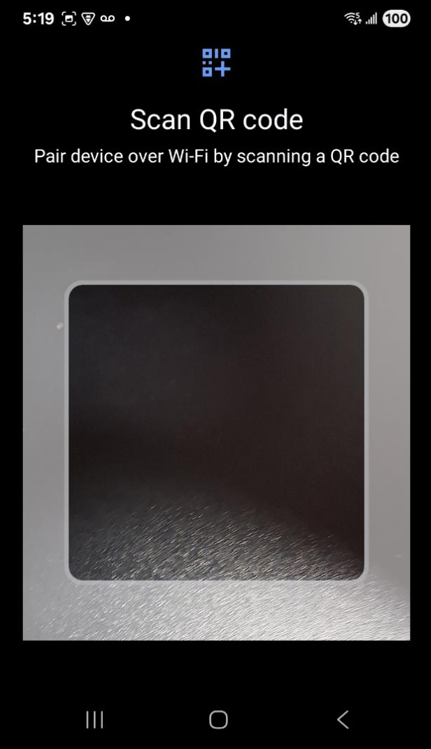
4.1 Connect via Wi-Fi (QR Code Pairing)
This is the simplest Wi-Fi connection method for supported Android devices.
Steps:
On your Android device, open Developer Options.
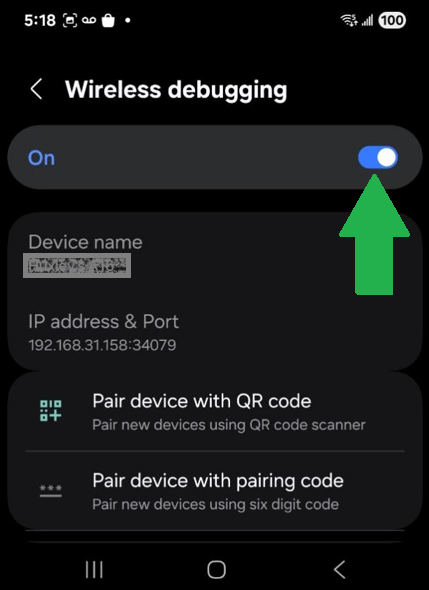
Tap Wireless debugging and turn it on.
Select Pair device with QR code.
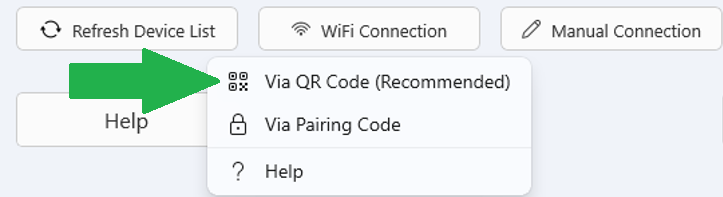
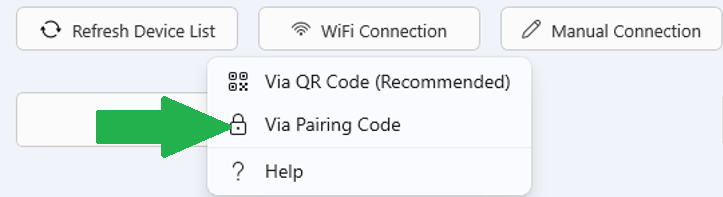
In the app on your Windows PC, choose Wi-Fi Connection > Via QR Code (Recommended) as the connection method.
A QR code will be displayed on the Windows screen.

Use your Android device to scan the QR code shown on the Windows PC.
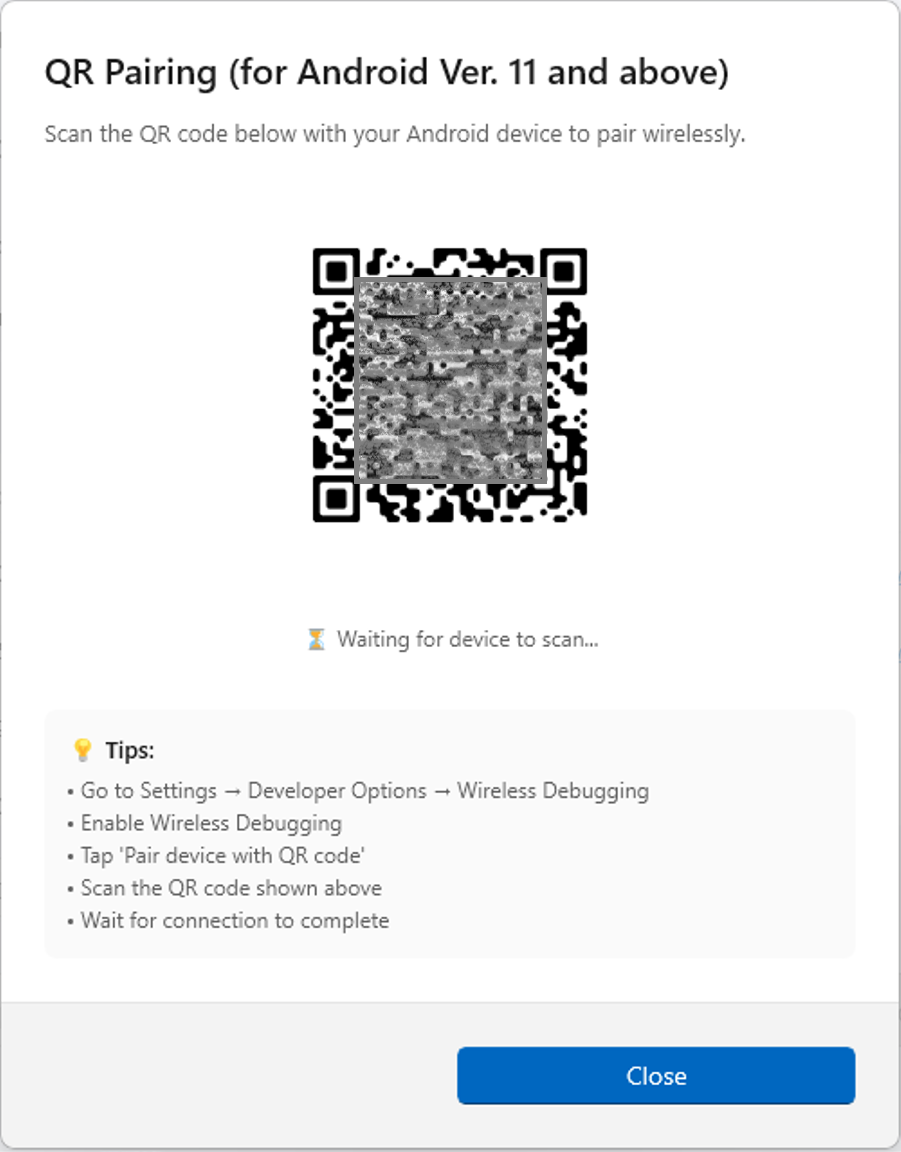
Once pairing is complete, the device will appear in the device list with a Connected status.
4.2 Connect via Wi-Fi (Pairing Code)
This Wi-Fi connection method pairs your Android device with the Windows PC using a temporary pairing code. It is useful when QR code scanning is not available or convenient.
Steps:
On your Android device, open Developer Options.
Tap Wireless debugging and turn it on.
Select Pair device with pairing code.
A pairing code and device name will be displayed on the Android device.
In the app on your Windows PC, choose Wi-Fi Connection > Via Pairing Code as the connection method.
Enter the pairing code shown on the Android device when prompted.

Confirm to complete the pairing process.

Once pairing is successful, the Android device will appear in the device list with a Connected status.
Notes:
The pairing code is time-limited. If it expires, generate a new code on the Android device and try again.
Ensure both devices remain on the same local network during pairing.
If pairing fails, you can retry or switch to USB connection as an alternative.
After the device is connected, select it and click Continue to proceed with APK installation.
4.3 Connect via Wi-Fi (Manual IP Address)
This method allows you to connect your Android device to the Windows PC using the device’s IP address and port number. It is useful when automatic pairing options are unavailable or when manual configuration is preferred.
Steps:
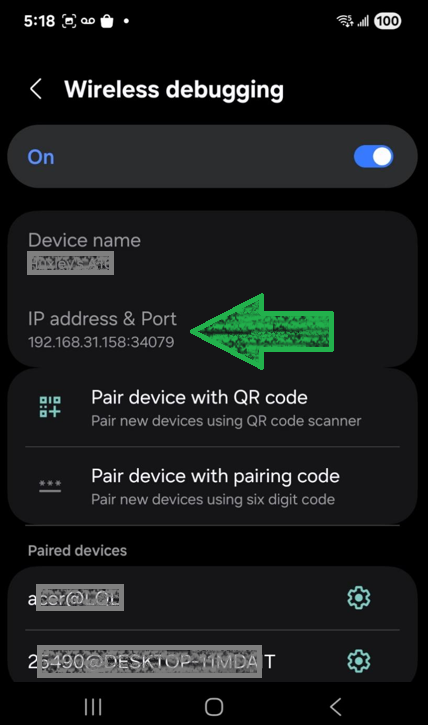
On your Android device, open Developer Options.
Tap Wireless debugging and make sure it is turned on.
Locate the IP address and port number displayed under Wireless debugging.
In the app on your Windows PC, choose Manual Connection as the connection method.
Enter the IP address and port number exactly as shown on the Android device.

Confirm to initiate the connection.

If the connection is successful, the Android device will appear in the device list with a Connected status.
Notes:
Both the Android device and Windows PC must be connected to the same local network.
The IP address may change if the device reconnects to a different network. If this happens, update the information and reconnect.
If manual connection fails, try pairing again using QR code or pairing code, or use a USB connection instead.
Once connected, select the device and click Continue to proceed with APK installation.
Method 3: Wi-Fi Connection (USB-Assisted, All Android Versions)
This method allows you to switch an Android device from a USB connection to a full Wi-Fi connection after a one-time setup. Once completed, the device can remain connected over Wi-Fi without the USB cable.
How This Method Works
The USB-assisted Wi-Fi method uses an initial USB connection to enable ADB’s TCP/IP (Wi-Fi) debugging mode. After Wi-Fi is enabled, the app connects to the device wirelessly, and the USB cable is no longer required.
Requirements
The Android device must be connected to the Windows PC via a USB cable (initial setup only).
The Android device and the Windows PC must be connected to the same Wi-Fi network.
USB debugging must be enabled on the Android device.
Android Debug Bridge (ADB) must already be available on the PC.
Supported Android Versions
All Android versions
(This method is especially useful for devices that do not support direct Wi-Fi pairing.)
Steps
Connect the Android device via USB
Use a USB cable to connect your Android device to the Windows PC and ensure the device is detected in the Device List.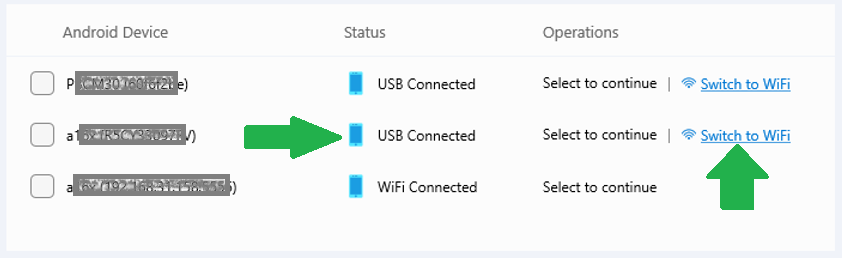
Switch the device to Wi-Fi mode
In the Device List, locate the Android device shown as USB Connected, then click Switch to WiFi under Operations.Confirm Wi-Fi connection
In the dialog that appears, click Connect via WiFi.
The app will enable ADB Wi-Fi mode and connect to the device using its IP address and port.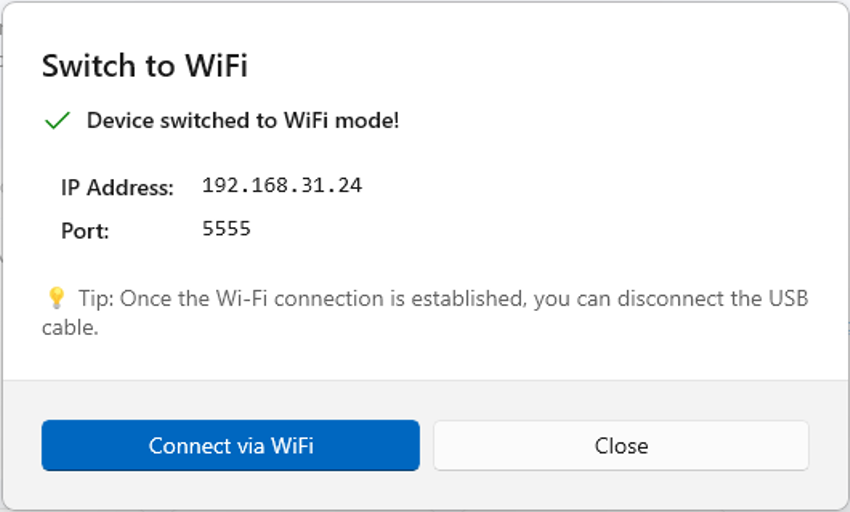
Verify connection status
Once connected, the device will appear in the list as WiFi Connected.
Disconnect the USB cable (optional)
After the Wi-Fi connection is established, you may safely unplug the USB cable if you no longer need it.
The Android device is now ready for APK installation over Wi-Fi.