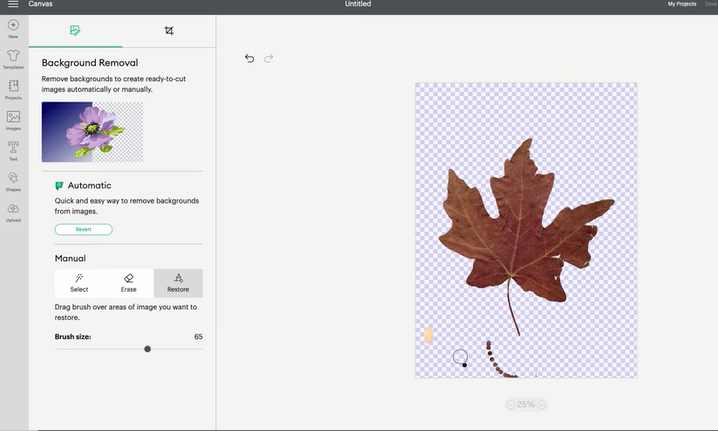
This guide will introduce you to the new features in Design Space, including automatic background removal, which simplifies the process of removing unwanted backgrounds from uploaded images. Additionally, the restore brush tool makes it easy to correct errors that may have been made during manual image cleaning.
Background removal is available exclusively to Cricket access subscribers, but all members are free to test and preview the feature. On the other hand, the restore tool is available to all members.
To begin using these features, you can start by clicking on the “upload” button in the left-hand toolbar on the canvas. From there, follow the prompts to upload your image. For example, you could upload an image of a leaf, which could be modified for use in a fall-themed iron-on sweatshirt.

Choose the “complex” image type if your image has fine details, and then proceed with the manual selection process. Click “select” and then use your cursor to select the areas you wish to keep. This process may take some time as you carefully remove the unwanted elements from the image. You can adjust the eraser size with the slider on the left-hand side of the screen.
After completing the manual selection process, click “continue” to access the next step, where you will be presented with two choices: a leaf cut-out or a print and cut image. The latter could be used as a sticker.
Now, let’s try automatic background removal by clicking “remove background” in the Design Space. The only remaining spot to clean up may be in the lower left-hand corner of the image.
Next, to demonstrate the restore feature, click “restore”. This tool allows you to easily bring back pieces of an image that may have been removed in error. For example, you may wish to bring back the hand holding the leaf. Simply paint the area you wish to restore and select around the edges to ensure that only that piece is being brought back.
Note that both background removal and restore features are only available on the Design Space desktop.


