Connect WSA to ADB
This is the most critical step of the setup process. The app will guide you through connecting WSA to ADB, ensuring your system is ready for APK installation.
There are two tasks that require your attention:
Task 1 – Turn on Developer Mode in WSA Settings
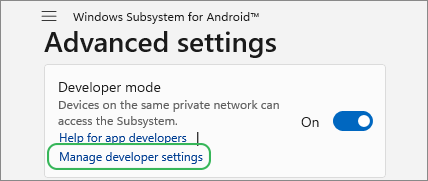
- Open the WSA Settings dialog (click the link provided on the GUI).
- Select Advanced Settings.
- Turn on Developer Mode.
- Click the Manage developer settings link.
Restart Windows if Needed
If you have already enabled Developer Mode but have been waiting for more than a few minutes, click the Restart Windows link on the GUI to restart Windows. After Window has been restarted, launch the app again to install APK files.
Task 2 – Allow ADB Debugging
Watch for the ‘Allow ADB debugging?’ dialog box, which is a security prompt asking for permission to enable ADB debugging.
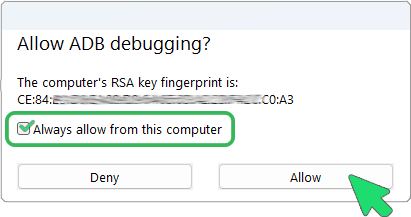
- Ensure you check ‘Always allow from this computer’.
- Click ‘Allow’ to proceed.
Reinstall WSA if Needed
If the ‘Allow ADB Debugging’ window doesn’t appear or you accidentally clicked ‘Deny’, click the link to reinstall WSA and try again.